I remember the joy of making S’mores around the campfire on a family trip. It was a simple pleasure that made our adventure sweeter. Preparing easy camping desserts at home before you go can make your camping trip even better.
Imagine enjoying treats like Peanut Butter Energy Balls or Campfire Cupcakes, all made ahead of time. This saves you hassle while you’re in the wilderness. In this article, I’ll share 10 simple yet delightful recipes for your camping trip.
These make ahead camping recipes are easy to prepare. They need minimal ingredients and effort. Whether you’re a seasoned camper or just starting, these desserts will be a hit with your fellow campers.
The Joy of Preparing Camping Desserts at Home
Preparing make ahead camping desserts brings a special joy. They are tasty and easy to carry. Making desserts before you go camping can make your trip less stressful and more fun. You can enjoy your favorite sweets outdoors without the rush of last-minute prep.
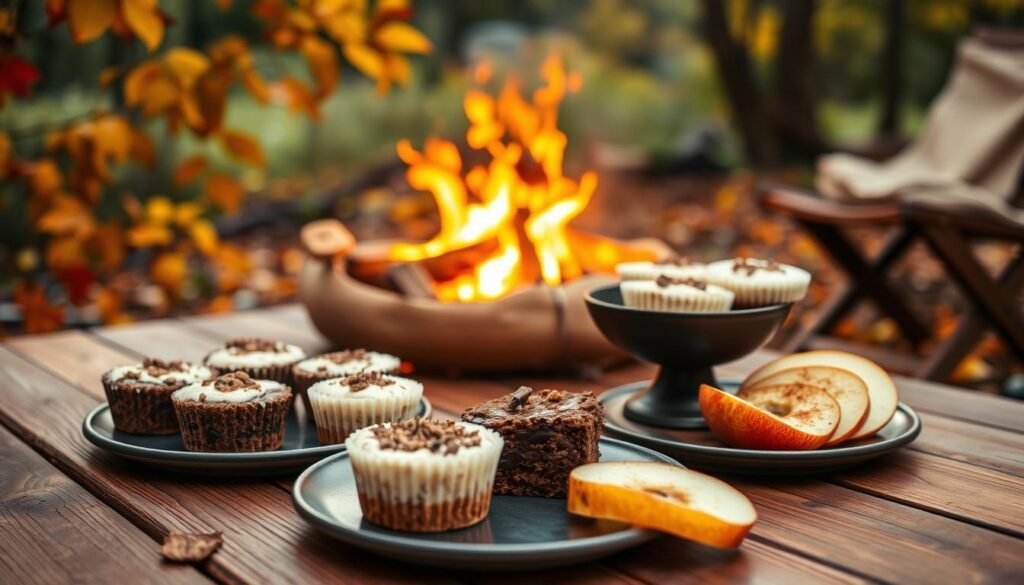
One big plus of making camping dessert recipes at home is saving time. You won’t spend hours cooking desserts while camping. Instead, you can enjoy nature and spend time with loved ones. Plus, having easy camping dessert ideas ready makes your meals even better.
At home, you can get creative with camping food ideas. You can try new things and make desserts that everyone will love. Whether you want something simple or fancy, making them ahead means you’ll have a great dessert for your meals.
Adding make ahead camping desserts to your camping plans makes the trip better. With a bit of planning and creativity, you can have many delicious desserts. They’ll be a hit with your whole group.
Essential Tools and Ingredients for Camping Dessert Prep
Forcamping dessert prep, the right tools and ingredients are key. You’ll need theessential toolsand ingredients to make tasty desserts on your trip.
First, let’s talk about the tools. You’ll need a mixing bowl, measuring cups, and utensils like spoons and spatulas. Also, a camping stove or fire pit is necessary for cooking. If baking is on your list, bring a portable oven or Dutch oven.
Now, let’s look at the ingredients. For most camping desserts, you’ll need basics like chocolate, marshmallows, graham crackers, and fruit. You might also want pre-made cookie dough or cake mix. Don’t forget spices or flavorings like vanilla extract or cinnamon.
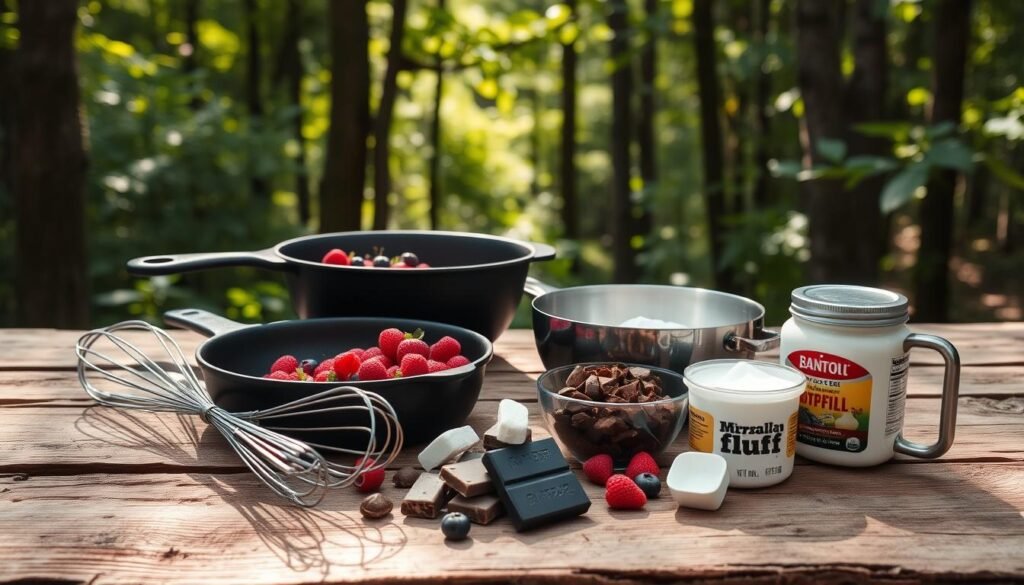
To make camping dessert prep smoother, prep some ingredients at home. Measure out dry ingredients like flour and sugar. Or pre-cut fruit and store it in airtight containers. With the right essential tools and ingredients, you can make many delicious desserts on your trip.
By choosing simple yet tasty desserts and being well-prepared, you’ll enjoy sweet treats on your camping adventure.
No-Bake Chocolate Oatmeal Cookies: A Camper’s Classic
Camping trips need simple yet tasty desserts. No-bake chocolate oatmeal cookies are perfect. They’re delicious and easy to make ahead of time, making them a camper’s favorite.
To make these chocolate oatmeal cookies, you’ll need a few ingredients. You’ll need 2 cups of rolled oats, 1 cup of creamy peanut butter, 1/2 cup of unsalted butter, 1/2 cup of granulated sugar, 1/4 cup of honey, 1 teaspoon of vanilla extract, and 1 cup of semi-sweet chocolate chips. This recipe makes 12 cookies and takes about 25 minutes to prepare.
Mixing the Base
In a large mixing bowl, mix the peanut butter, butter, sugar, and honey until smooth. Add the vanilla extract. This mixture is the base of your no-bake chocolate oatmeal cookies.
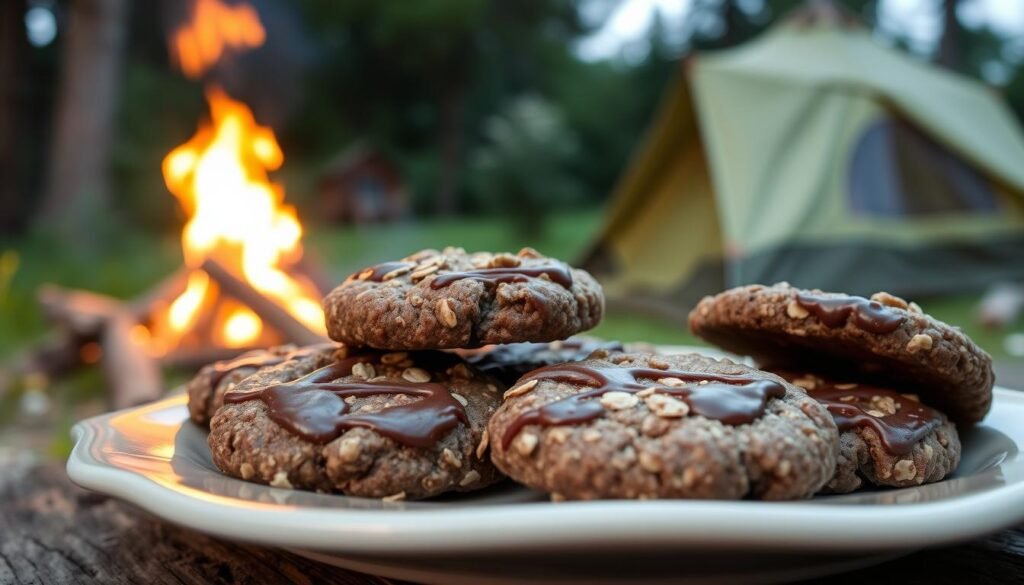
Add the rolled oats to the mixture and stir until well combined. Melt the chocolate chips in a microwave-safe bowl in 30-second increments, stirring between each interval until smooth. Then, fold the melted chocolate into the oat mixture until it’s fully incorporated.
Proper Cooling and Setting
Scoop tablespoon-sized balls of the mixture onto a parchment-lined baking sheet. Refrigerate for at least 15-20 minutes to set. Once set, transfer the cookies to an airtight container and store in the refrigerator until ready to serve. These camper’s classic treats are perfect for satisfying sweet tooth cravings on your camping adventure.
These no-bake chocolate oatmeal cookies show the joy of no bake camping desserts. They’re easy to make, require no baking, and are sure to be a hit on your next camping trip.
Gooey S’mores Bars: Campfire Flavor Without the Flame
Gooey S’mores Bars bring the campfire taste to your campsite or backyard, without the flames. They’re great for camping trips or any time you want s’mores without the campfire trouble.
Creating the Graham Cracker Base
The base of these tasty bars is a graham cracker crust. It’s simple to make with just a few things: graham crackers, sugar, and melted butter. Crush the graham crackers, mix with sugar and melted butter, and press into a baking dish.
Adding Chocolate and Marshmallow Layers
Then, you add layers of rich chocolate and fluffy marshmallows. Pour melted chocolate over the crust, followed by marshmallows. Use mini marshmallows or cut regular ones into smaller pieces for even spread.
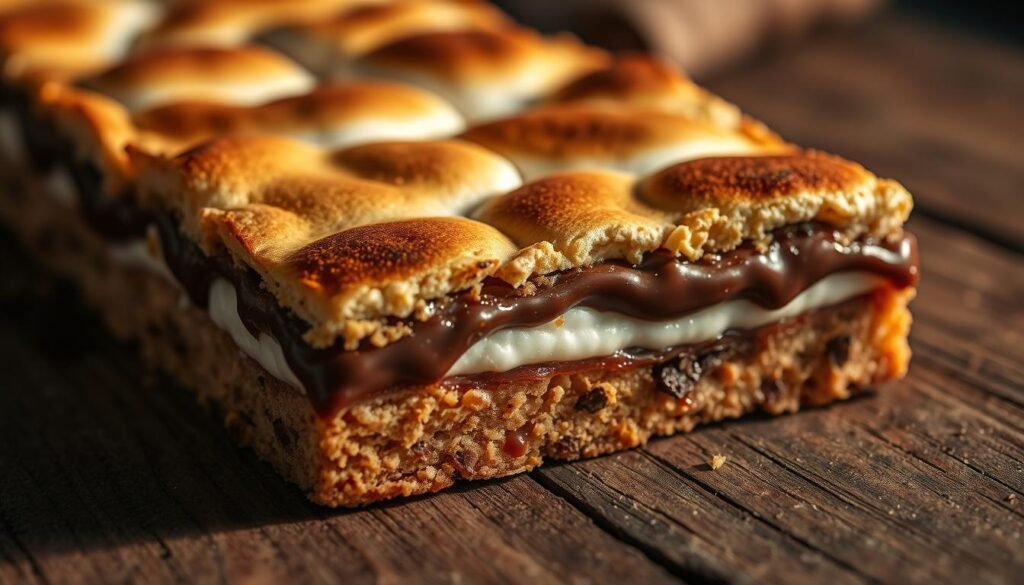
The bars bake until the marshmallows are golden, giving them that campfire flavor without flames. Let them cool completely before cutting into squares. This dessert is perfect for make ahead camping desserts, ready to go when you are.
To make these Gooey S’mores Bars, you need about 40 minutes of prep. They serve 12 people. They’re a great pick for easy camping dessert ideas and will be a hit at your next outdoor event.
With these s’mores bars, you can enjoy camping desserts without a campfire. They’re ideal for camping desserts that are easy to make and transport.
Individual Mason Jar Fruit Cobblers: Portable Perfection
My favorite camping treat is the Individual Mason Jar Fruit Cobbler. It’s easy to take and eat under the stars. These portable camping desserts are simple to enjoy without the fuss of making them at the campsite.
To make these tasty mason jar desserts, start with the fruit filling. Preparing the Fruit Filling means mixing fresh or frozen fruit with sugar and cornstarch. For 6 servings, use 2 cups of mixed berries or sliced peaches.
Preparing the Fruit Filling
Take 2 cups of your favorite fruit and mix it with 2 tablespoons of sugar and 1 tablespoon of cornstarch. Stir until the fruit is well coated.
Making the Cobbler Topping
The cobbler topping is easy to make. Mix 1 cup of flour, 1/2 cup of sugar, and 1/2 teaspoon of baking powder. Add 1/2 cup of cold butter and mix until it’s like coarse crumbs.
Assembling in Mason Jars
To put the cobblers together, fill each mason jar halfway with fruit filling. Then add a layer of cobbler topping. Repeat with another layer of fruit and topping.
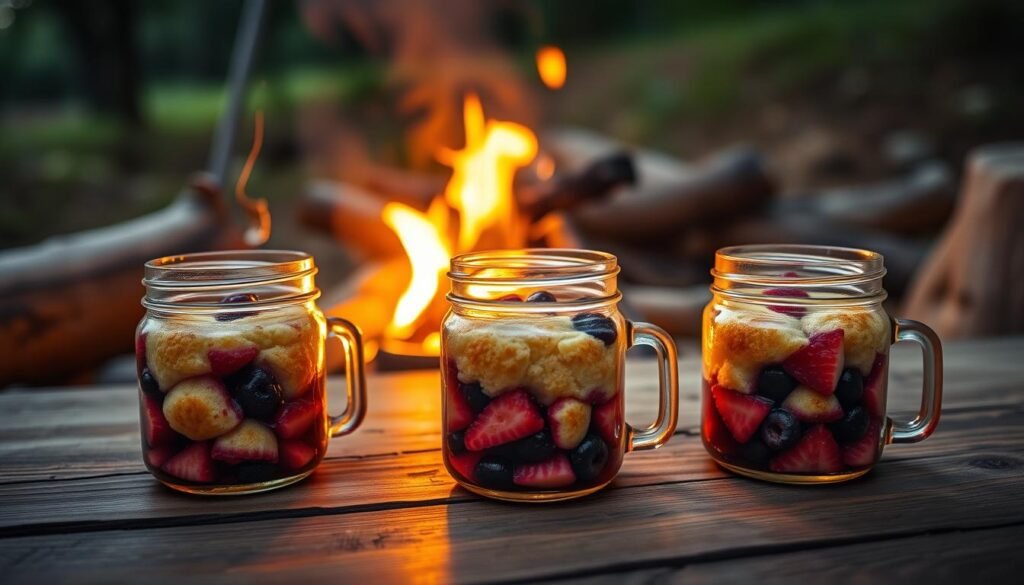
These Individual Mason Jar Fruit Cobblers are not only tasty but also quick to prepare. They’re great for camping, potlucks, or any time you need a simple yet satisfying dessert.
Hearty Trail Mix Cookies: Energy-Packed Treats
Hearty Trail Mix Cookies are a great camping dessert. They mix trail mix’s goodness with cookie convenience. These energy-packed treats are tasty and simple to prepare ahead of time, perfect for camping.
To make Hearty Trail Mix Cookies, you need to mix dry and wet ingredients. Here’s how:
Mixing Dry and Wet Ingredients
First, mix 2 1/4 cups of all-purpose flour, 1 cup of rolled oats, 1 teaspoon of baking soda, and 1 teaspoon of salt in a big bowl. Then, in another bowl, mix 1 cup of peanut butter, 1/2 cup of butter, 1/2 cup of granulated sugar, and 1/4 cup of brown sugar until smooth.
Incorporating Trail Mix Components
Add 1 cup of trail mix, with nuts, dried fruits, and chocolate chips, to the dry ingredients. Then, mix the wet and dry ingredients together until a dough forms. This step is key to spreading the trail mix evenly in the cookie dough.
Baking and Cooling Process
Make balls of dough, about a tablespoon each, and place them on a baking sheet lined with parchment paper. Bake at 375°F (190°C) for 10-12 minutes, or until they’re lightly golden. Let them cool on the sheet for 5 minutes before moving them to a wire rack to cool fully.
These Hearty Trail Mix Cookies are great for camping desserts. They’re make ahead camping treats that keep well in airtight containers for days. They’re perfect for camping desserts that are both energizing and easy to eat on the move.
Chocolate-Dipped Strawberries with Graham Cracker Dust
Take your camping desserts to the next level with Chocolate-Dipped Strawberries with Graham Cracker Dust. It’s easy to make and quick to prepare. This makes it perfect for quick camping desserts.
You’ll need fresh strawberries, chocolate, and graham crackers for this treat. It serves 4 people and is ready in just 15 minutes. This makes it a great camping dessert to make ahead of time.
Preparing the Strawberries
Begin by washing and drying 4 large strawberries. Pat them dry with a paper towel to remove excess moisture. This is key for the chocolate to stick well.
Melting and Dipping Technique
Melt 1 cup of chocolate chips in a microwave-safe bowl. Do this in 30-second increments, stirring between each interval, until smooth. Then, dip each strawberry into the melted chocolate, covering it about three-quarters of the way.
Crush 1/4 cup of graham crackers into fine crumbs. Roll the chocolate-dipped strawberries in the graham cracker crumbs to coat. Place the coated strawberries on a baking sheet lined with parchment paper. Refrigerate for at least 5 minutes to set the chocolate.
This Chocolate-Dipped Strawberries with Graham Cracker Dust recipe is a tasty twist on traditional camping desserts. The mix of fresh strawberries, rich chocolate, and crunchy graham cracker dust is a quick and delightful treat. It’s sure to impress your fellow campers.
Peanut Butter Energy Balls: No-Bake Protein Bites
Camping desserts can’t get better than peanut butter energy balls. They’re tasty, nutritious, and easy to make. These peanut butter energy balls are great for camping because they need no baking and are full of protein.
Combining Base Ingredients
To make these no-bake protein bites, you’ll need a few simple things: peanut butter, oats, honey, and chocolate chips. In a big mixing bowl, mix 2 cups of rolled oats, 1 cup of creamy peanut butter, and 1/2 cup of honey until well combined. Then, add 1/2 cup of chocolate chips and stir.
The mix should be sticky and hold shape when pressed. If it’s too dry, add more honey. If it’s too sticky, add more oats.
Rolling and Shaping Technique
When your mix is ready, it’s time to shape your peanut butter energy balls. Use a small cookie scoop or your hands to make balls, about 1 inch big. You should get around 12 energy balls.
Put the energy balls on a baking sheet lined with parchment paper. Refrigerate for at least 30 minutes to set.
Optional Coatings and Variations
For an extra touch, roll your energy balls in coatings like chopped nuts, shredded coconut, or cinnamon. This adds texture and flavor to your camping desserts.
These delicious camping desserts are not only tasty but also give you energy. They’re great for snacking on the go or as a sweet treat after dinner.
Camping Desserts Make Ahead: Spiced Banana Bread Muffins
My favorite camping dessert is Spiced Banana Bread Muffins. They’re perfect for a sweet treat outdoors. These muffins are easy to make at home. They’re filled with spices and sweet bananas.
To begin, mix the batter for your Spiced Banana Bread Muffins. In a big bowl, combine 2 cups of flour, 1 teaspoon of baking powder, 1/2 teaspoon of salt, and 1/4 teaspoon of nutmeg. In another bowl, mash 3 ripe bananas. Mix them with 1/2 cup of sugar, 1/4 cup of melted butter, and 2 eggs.
Adding Mix-ins and Spices
Now, mix the wet and dry ingredients together. Add 1/2 cup of chopped walnuts or pecans for crunch. Also, add 1 teaspoon of cinnamon for extra spice. Mix until just combined, without overmixing.
Baking and Cooling Process
Put the batter into 12 muffin cups. Bake at 375°F for 20-25 minutes, until a toothpick comes out clean. Let the muffins cool on a wire rack. Store them in an airtight container. These Spiced Banana Bread Muffins are great for camping because they’re easy to pack and transport.
This recipe makes a delicious make ahead camping dessert. It’s perfect for enjoying around the campfire or as a snack on a hike. These Spiced Banana Bread Muffins are a great choice.
Chewy Chocolate Chip Cookie Bars: Better Than Store-Bought
Chewy chocolate chip cookie bars are great for camping trips. They’re easy to make, pack, and serve. They’re perfect for enjoying outdoors.
Making the Cookie Dough
To begin, mix the cookie dough. In a big bowl, cream 1 cup of unsalted butter and 3/4 cup of white granulated sugar until fluffy. Next, beat in 1 cup of brown sugar and 2 large eggs until they’re well mixed.
In another bowl, mix 2 1/4 cups of all-purpose flour, 1 tsp of baking soda, and 1 tsp of salt. Add these dry ingredients to the wet ingredients, stirring until they’re just combined. Then, stir in 2 cups of semi-sweet chocolate chips.
Baking in Bar Form
Press the dough into a 9×9-inch baking dish lined with parchment paper. Bake at 350°F for 25-30 minutes. The edges should be lightly golden brown.
Let the cookie bars cool. Then, cut them into 12-16 bars, depending on size. Wrap each bar in plastic wrap or aluminum foil to keep them fresh.
These chewy chocolate chip cookie bars are a tasty and simple camping dessert. They’re great for satisfying your sweet tooth outdoors.
Campfire-Ready Rice Krispie Treats with Chocolate Drizzle
Rice Krispie Treats are a classic campfire treat that can be elevated with a simple chocolate drizzle. These campfire desserts are not only delicious but also easy to make ahead, making them perfect for camping trips.
To start, you’ll need to melt marshmallows perfectly. This can be done by heating them in a pot over low heat, stirring constantly, until they’re smooth and gooey. It’s essential to be patient during this step to avoid burning the marshmallows.
Incorporating Cereal and Add-ins
Once your marshmallows are melted, it’s time to incorporate the cereal. Quickly stir in the Rice Krispies cereal until it’s evenly coated with the marshmallow mixture. You can also add in some fun mix-ins like nuts or dried fruit to give your treats some extra texture and flavor.
Adding the Chocolate Finish
After shaping your Rice Krispie Treats, let them cool slightly before drizzling with melted chocolate. This chocolate drizzle adds a rich, velvety texture that complements the gooey marshmallows perfectly. To make the chocolate drizzle, simply melt some chocolate chips in a microwave-safe bowl in 30-second increments, stirring between each interval, until smooth.
Here’s a simple recipe to make 12 Campfire-Ready Rice Krispie Treats with Chocolate Drizzle:
- 2 cups of Rice Krispies cereal
- 1 cup of marshmallows
- 1/2 cup of chocolate chips
- Optional: nuts, dried fruit
Preparation time is approximately 20 minutes. These make ahead camping desserts recipes are perfect for camping trips as they can be prepared in advance and are easy to transport.
Make-Ahead Apple Crisp Foil Packets: Heat and Eat
Make-Ahead Apple Crisp Foil Packets are a game-changer for camping desserts. This delicious dessert can be prepared ahead of time, making it perfect for camping trips.
Preparing the Apple Filling
To start, peel, core, and slice 2-3 apples, depending on their size. I like to use a mix of Granny Smith and Gala apples for a nice balance of sweet and tart. In a large bowl, combine the sliced apples, 1/4 cup granulated sugar, and 2 tablespoons all-purpose flour. Toss until the apples are evenly coated.
Making the Crisp Topping
The crisp topping is a key part of this dessert. In a separate bowl, mix together 1/2 cup rolled oats, 1/4 cup brown sugar, and 1/2 teaspoon cinnamon. Add 1/4 cup cold unsalted butter and use your fingers or a pastry blender to work the butter into the dry ingredients until the mixture is crumbly.
Assembling and Wrapping in Foil
To assemble the apple crisp foil packets, divide the apple filling among four to six sheets of aluminum foil, depending on the desired serving size. Top each portion with the crisp topping. Fold the foil over the filling to create a packet, making sure to seal the edges tightly. These packets can be made ahead of time and stored in an airtight container until you’re ready to heat them up.
To heat the apple crisp, simply place the foil packets on a campfire grill or in a camp oven. Heat for 10-15 minutes, or until the apples are tender and the topping is crispy. Serve warm, topped with vanilla ice cream if desired. This recipe serves 6 people and takes 30 minutes to prepare, making it an ideal camping dessert.
Expert Tips for Storing and Transporting Your Camping Desserts
To keep your camping desserts fresh, it’s key to store and transport them right. Using the right containers and techniques is essential. Choose the Right ContainersFor storing desserts, airtight containers are best. They keep treats fresh by blocking air, moisture, and pests. Look for containers that are waterproof and tough for camping.
Keep Them CoolMany desserts, like those with chocolate or dairy, need cooler temps to stay fresh. In warm weather, use insulated bags with ice packs. This is vital for desserts likeChocolate-Dipped Strawberries with Graham Cracker DustorNo-Bake Chocolate Oatmeal Cookies.
When moving your desserts, pack them securely to avoid damage. Use dividers or wrap items likeMason Jar Fruit CobblersorPeanut Butter Energy Ballsto prevent them from getting crushed or mixed up.
By following these tips, you can enjoy your make-ahead camping treats as much as those made on the campsite. Happy camping and happy dessert-making!
Sweet Memories: Enjoying Desserts Under the Stars
As I sit under the starry night sky, I feel a deep connection. Enjoying camping desserts is more than just a sweet treat. It’s about making memories with loved ones and enjoying delicious food.
Camping under the stars brings us closer to family and friends. Desserts like s’mores and apple crisp make these moments special. They bring us joy and a sense of togetherness.
When we enjoy camping desserts, we’re not just eating. We’re creating memories that last a lifetime. Camping and desserts together make for an unforgettable adventure. So, indulge in your favorite desserts and make sweet memories under the stars.
0 Comments