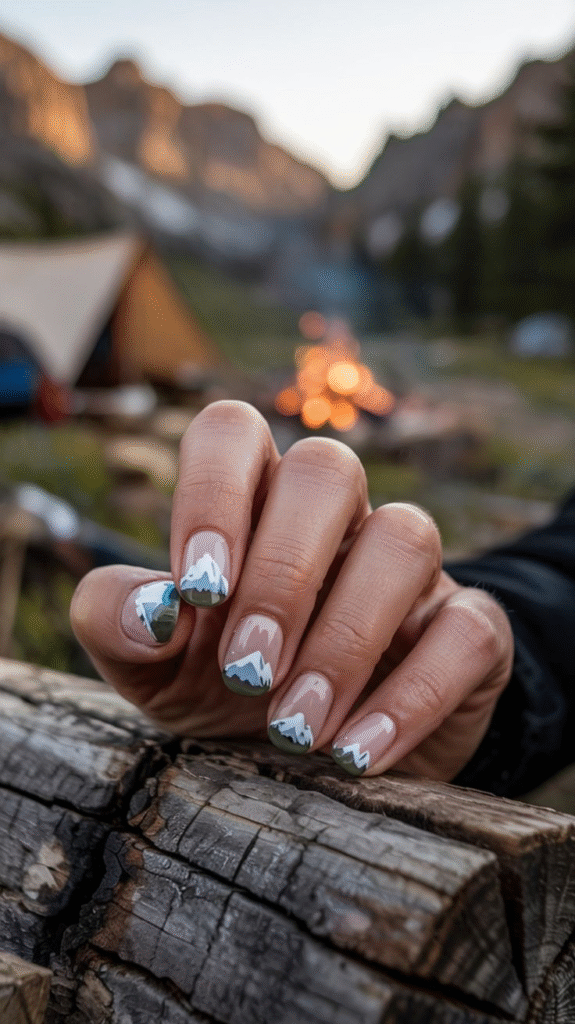
Camping Nails Designs: A Minimalist Mountain Nail Art Tutorial
If you love clean, minimalist nail looks inspired by the outdoors, Camping Nails Designs are the perfect blend of style and adventure. This mountain-inspired manicure channels alpine landscapes, cozy campfire vibes, and fresh-air simplicity—all while remaining elegant enough for everyday wear.
This step-by-step tutorial shows you how to create a mountain nail design using a soft nude base, deep green peaks, and crisp white snow caps. It’s beginner-friendly, Pinterest-worthy, and ideal for anyone looking to experiment with outdoor-inspired nail art.
What You’ll Need (Supplies List)
To create this Camping Nails Design, gather the following items:
Base & Color Polishes
- Clear base coat
- Nude or pale pink polish (sheer or creamy)
- Dark green polish (forest green or olive)
- White polish (opaque)
- Light blue polish (optional, for snow shading)
- Clear glossy top coat
Tools
- Nail file (180–240 grit)
- Cuticle pusher
- Thin nail art or striping brush
- Small cleanup brush
- Acetone or nail polish remover
- Paper towel or foil
How Long Does This Camping Nails Design Take?
- Prep & base: 10–15 minutes
- Nail art application: 20–25 minutes
- Drying & sealing: 10–15 minutes
Total time: ~45–55 minutes
This makes it an excellent DIY project for weekends, pre-camping trips, or seasonal nail refreshes.
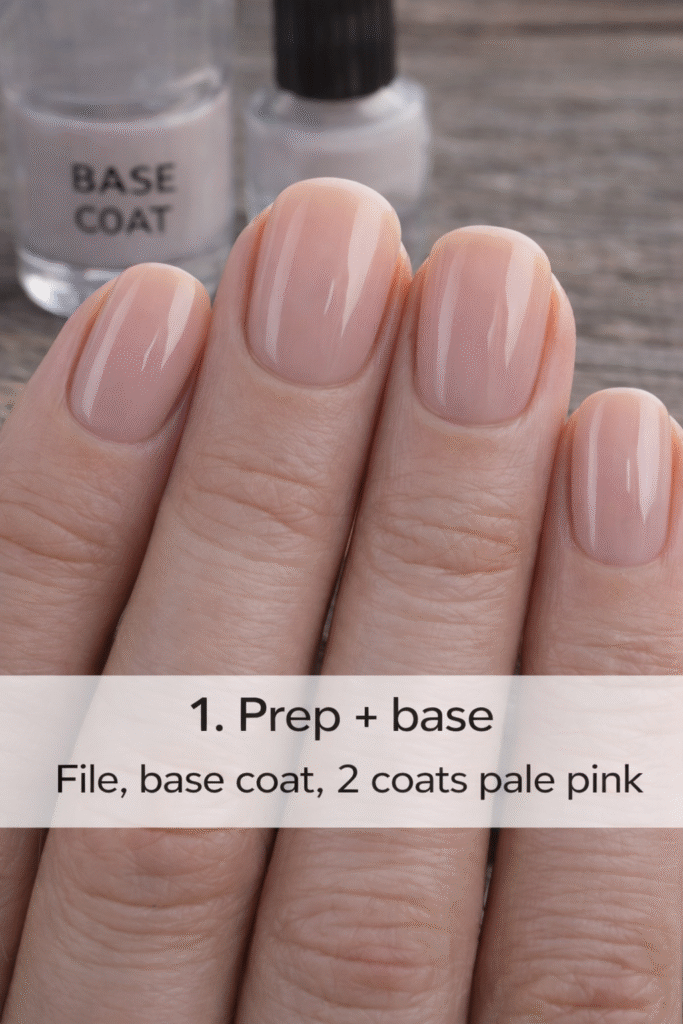
Step 1: Prep and Base Color
Every great Camping Nails Design starts with proper nail prep.
File your nails to your desired shape—short to medium-length nails work best for this look. Gently push back cuticles and wipe nails clean to remove oils.
Apply one thin base coat, then follow with two thin coats of nude or pale pink polish. This neutral base mimics natural tones and keeps the design looking clean and outdoorsy.
Image Insert:
Step 2: Paint the “Land” Band at the Tip
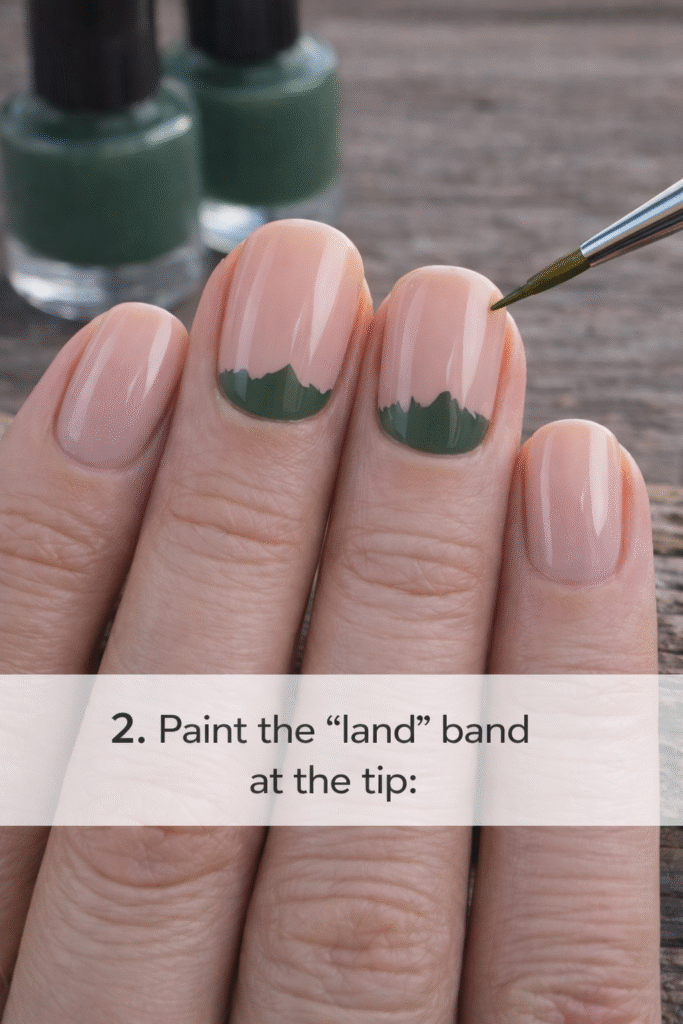
This step forms the foundation of your mountain scenery.
Using dark green polish, paint a thin, uneven band across the tips of your nails. Avoid straight lines—organic curves make the design feel more natural, like rolling hills at a campsite.
This element is essential in most Camping Nails Designs, as it grounds the look visually.
Image Insert:
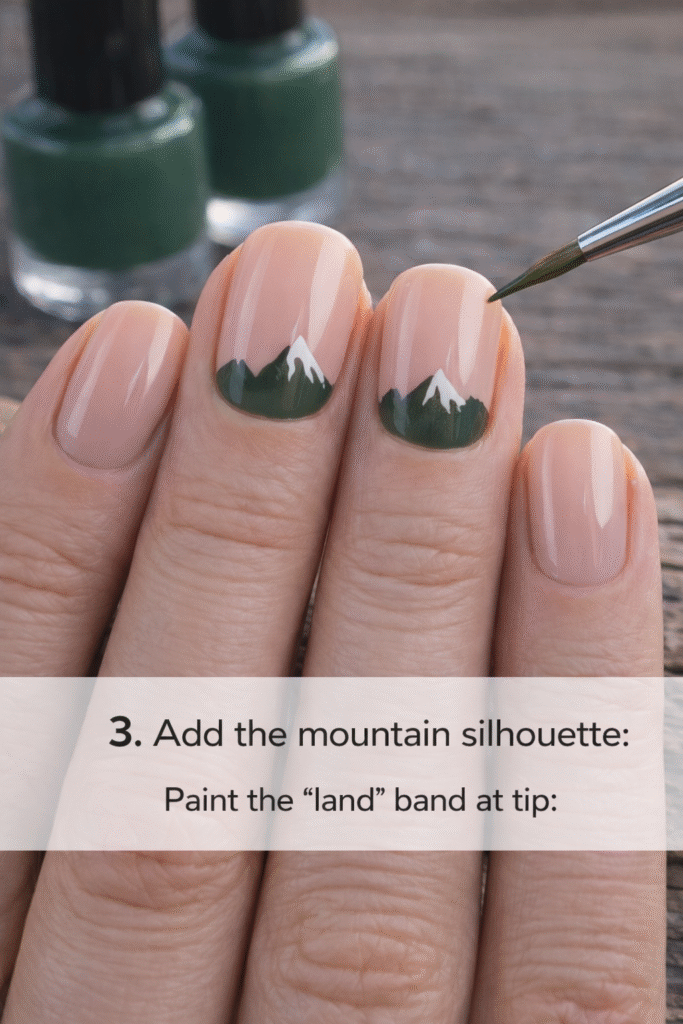
Step 3: Add the Mountain Silhouette
Now bring the mountains to life.
With a thin nail art brush, extend upward from the green band to create jagged peaks. Vary the height and spacing of each mountain—real landscapes are imperfect, and that’s what makes them beautiful.
Let this layer dry before moving on.
Image Insert:
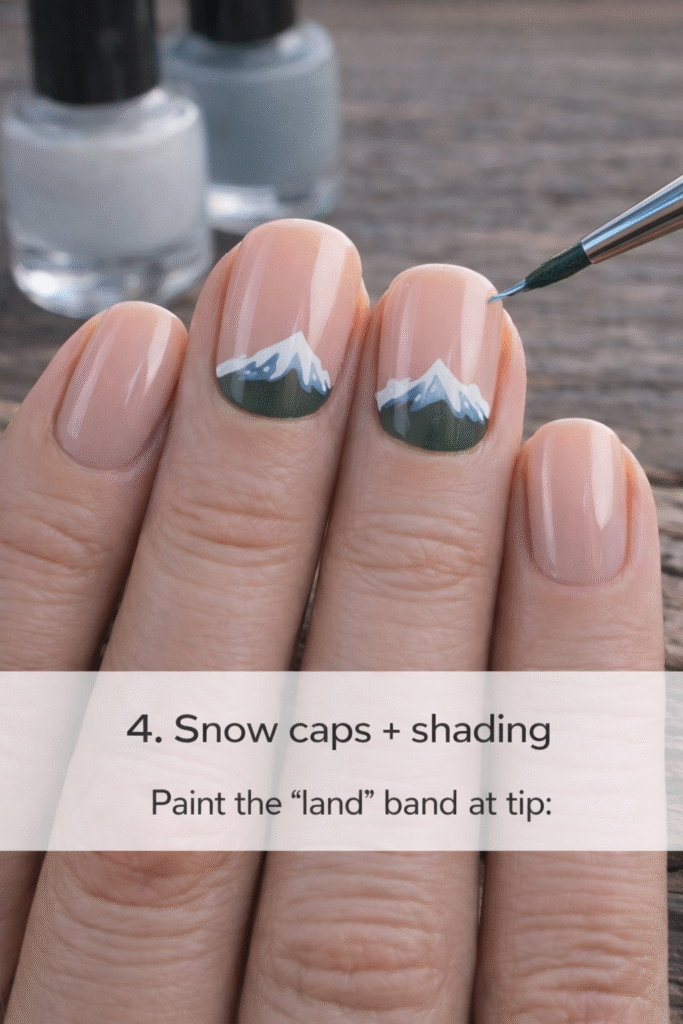
Step 4: Snow Caps and Shading
This step adds depth and realism.
Paint white snow caps along the top of each mountain using sharp, uneven strokes. For added dimension, lightly shade one side of the snow with light blue polish.
This subtle shading elevates your Camping Nails Design from simple to professional-looking.
Image Insert:
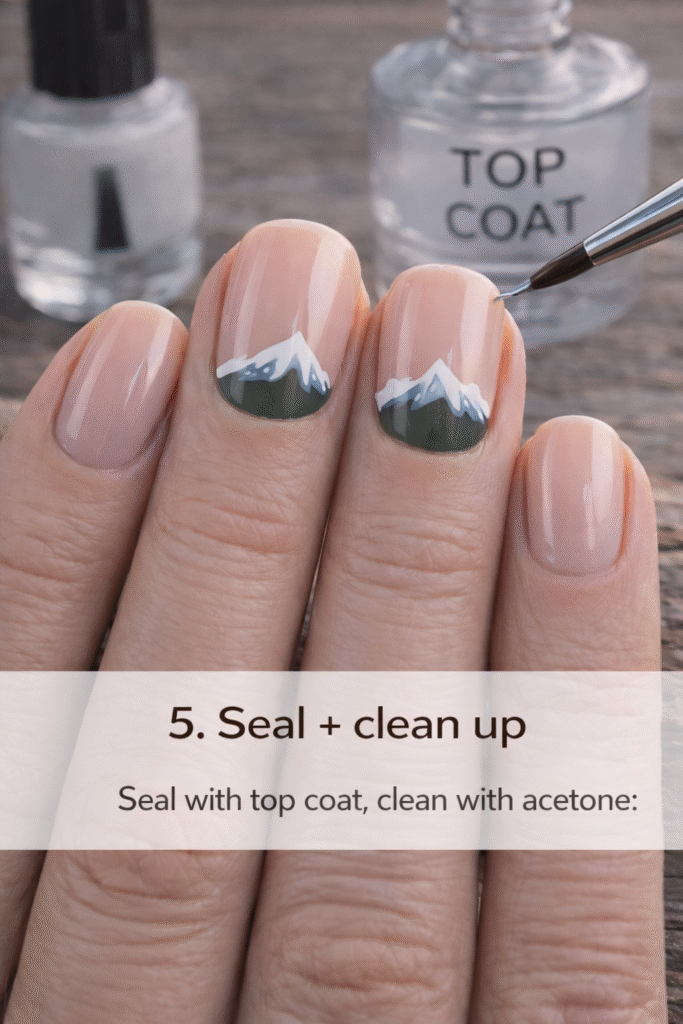
Step 5: Seal and Clean Up
Once all artwork is dry, apply a glossy top coat using a floating motion to avoid smudging.
Use a cleanup brush dipped in acetone to clean edges around the cuticle and sides for a crisp finish.
Image Insert:
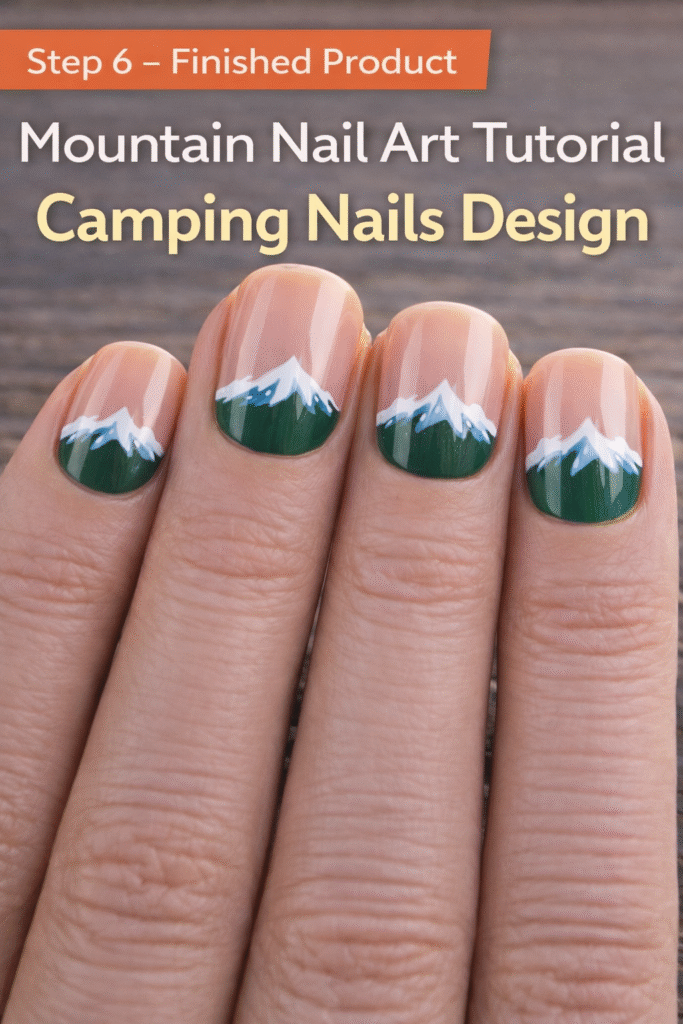
Final Result: Completed Camping Nails Design
Your finished nails should look calm, minimal, and inspired by nature—perfect for camping trips, outdoor lovers, or anyone who enjoys earthy aesthetics.
Image Insert:
Best Practices for Camping Nails Designs
- Use thin polish layers for clean lines
- Let each step dry before continuing
- Rest your hand on a flat surface for stability
- Practice mountain shapes on paper first
- Clean mistakes early for a polished result
Camping Nails Designs: Variations & Alternatives
Want to customize your look? Try these ideas:
- Fall camping nails: Rust, brown, and cream tones
- Winter camping nails: Charcoal, white, and icy blue
- Matte finish: For a modern, editorial feel
- Accent nail: Keep the design on one or two nails
- Sun or moon detail: Add a tiny circle above the peaks
Final Thoughts
This Camping Nails Design proves that simple shapes and natural colors can create a stunning manicure. Whether you’re heading on a camping trip, embracing outdoor-inspired fashion, or just love earthy nail art, this look is versatile, calming, and easy to recreate at home.
With the right tools and a little patience, you’ll have a manicure that feels adventurous, cozy, and effortlessly stylish.
0 Comments