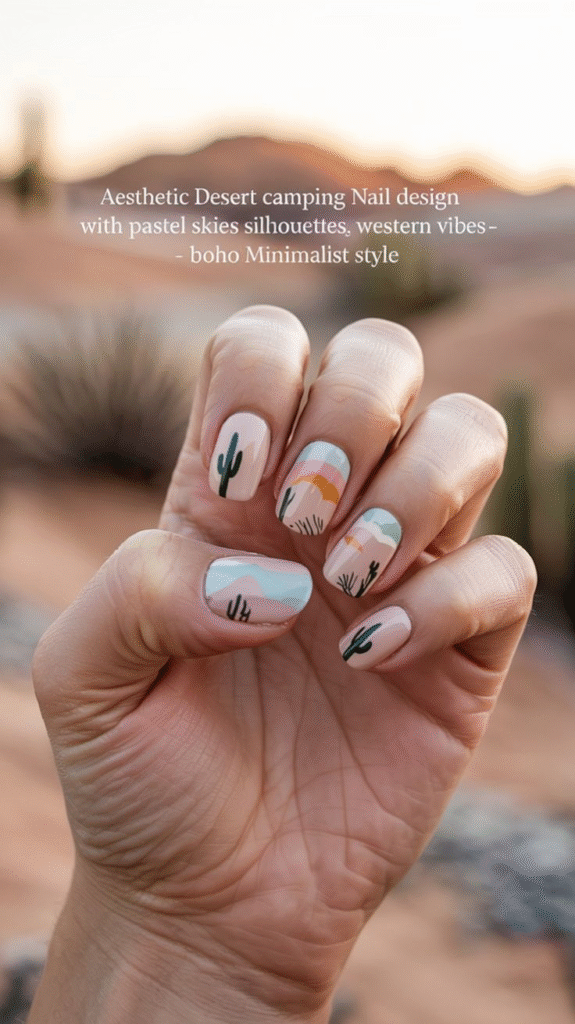
If you love Camping Nail Designs that feel calm, earthy, and effortlessly stylish, this Aesthetic Desert Camping Nail Design is the perfect inspiration. Featuring pastel desert skies, rolling dunes, subtle sun shapes, and minimalist cactus silhouettes, this manicure captures the peaceful beauty of desert camping with a soft, modern twist.
This design is ideal for outdoor lovers, road-trip aesthetics, boho minimalists, and anyone who wants nails that feel artistic without being overwhelming. Best of all, it’s beginner-friendly when broken into simple layers.
In this step-by-step guide, you’ll learn how to recreate this desert-inspired camping nail look from scratch, including color placement, layering techniques, best practices, alternatives, and finishing tips.
What You’ll Need (Supplies List)
Before starting, gather the following tools and polishes to create this Desert Camping Nails Design:
Base & Color Polishes
- Clear base coat
- Nude or soft beige polish (warm-toned)
- Pastel blue polish (sky tone)
- Pastel peach or sand polish
- Soft terracotta or muted sunset orange
- White polish (for sun + highlights)
- Dark green polish (for cactus silhouettes)
- Clear glossy top coat (or matte, optional)
Tools
- Nail file (180–240 grit)
- Cuticle pusher
- Thin nail art brush (detail brush)
- Small flat brush (for color bands)
- Dotting tool or toothpick
- Cleanup brush
- Acetone or nail polish remover
- Paper towel or foil
How Long Does This Design Take?
- Prep & base: 10–15 minutes
- Desert art layers: 25–30 minutes
- Drying & sealing: 10–15 minutes
Total time: approximately 50–60 minutes
This makes it a great weekend DIY or a relaxing creative session before a trip or seasonal refresh.
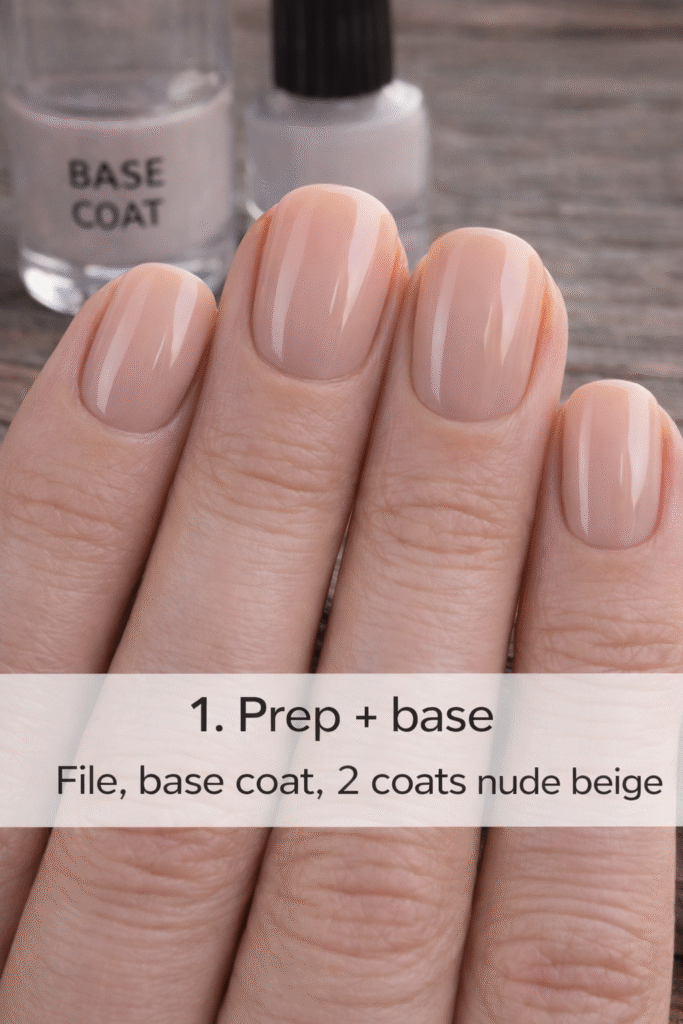
Step 1: Prep and Base Color
Every successful Camping Nail Design starts with proper prep.
Begin by shaping your nails to a short or medium length. Rounded, oval, or soft square shapes work best for this design because they allow the landscape art to flow naturally across the nail.
Push back cuticles gently, then wipe nails clean to remove oils. Apply one thin base coat and allow it to dry completely. Follow with two thin coats of nude or soft beige polish. This warm neutral base mimics desert sand and helps the pastel colors stand out.
Let the base fully dry before moving on.
Image Insert:
Step 2: Create the Pastel Desert Sky
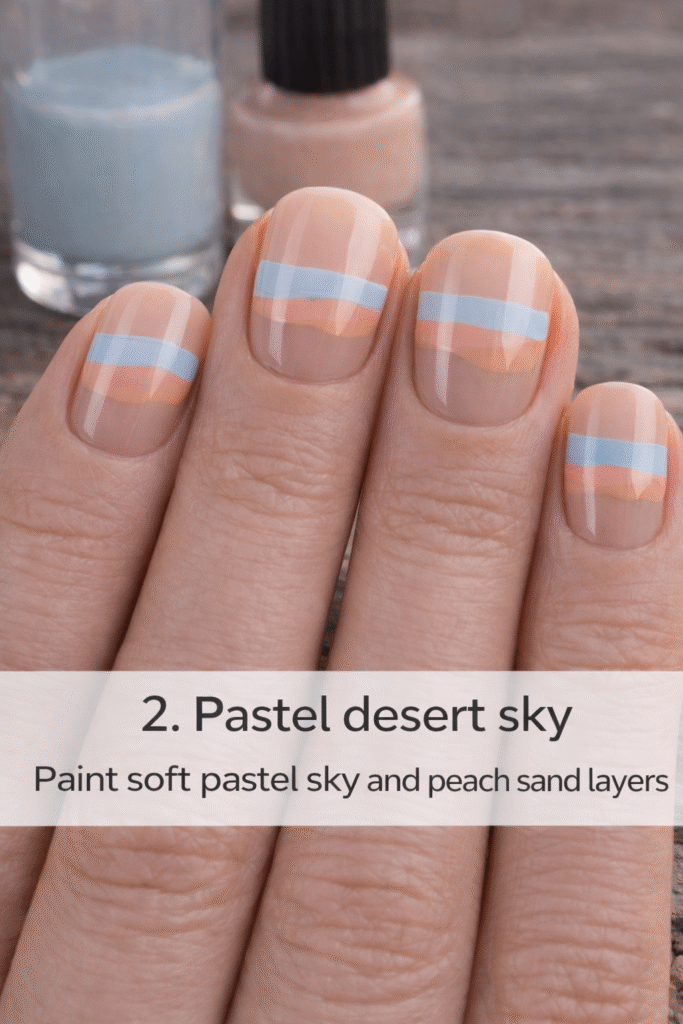
This step sets the mood of the entire design.
Using a flat or detail brush, apply a soft pastel blue band across the upper portion of the nail to represent the sky. Keep the line slightly curved rather than straight to maintain an organic look.
On some nails, layer a second band of peach or pale sand tone just below the sky color. Blend gently where the colors meet for a smooth, dreamy transition.
Not every nail needs the exact same sky layout—slight variations add charm while keeping the set cohesive.
Image Insert:
Step 3: Add Sun and Horizon Details
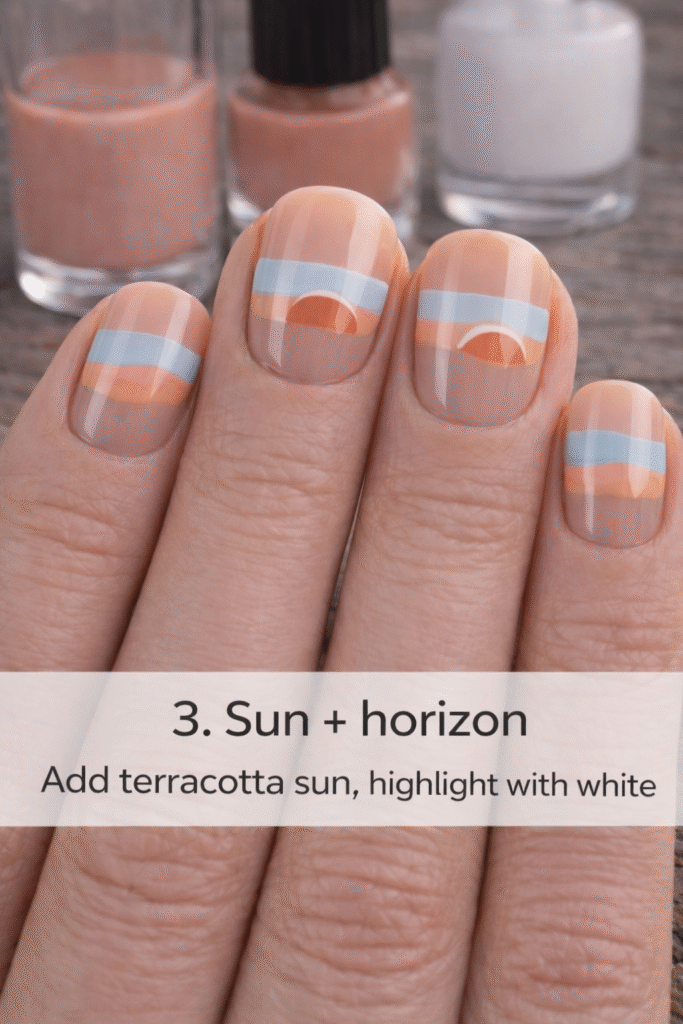
Now it’s time to bring warmth into the design.
Using a dotting tool or the tip of a small brush, place a half-circle or curved arc near the horizon line using terracotta or muted orange polish. This represents the desert sun rising or setting.
For added softness, lightly outline or highlight part of the sun with white polish. Keep shapes minimal—this design relies on subtlety rather than detail overload.
Allow this layer to dry before continuing.
Image Insert:
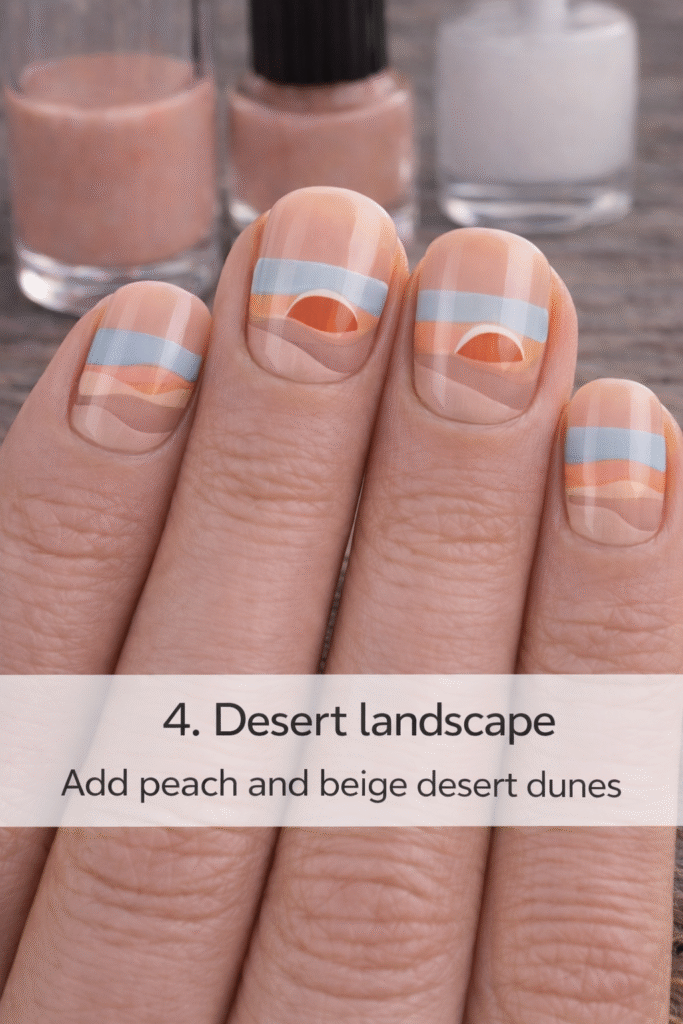
Step 4: Paint the Desert Landscape Layers
This step builds depth and gives the nails their recognizable desert look.
Using pastel sand, peach, or beige tones, add rolling dune shapes beneath the sky. Paint curved, layered bands that gently flow across the nail.
Alternate the order of colors slightly on each nail so the design feels natural and artistic rather than repetitive. Avoid hard lines—soft, blended curves work best for this aesthetic.
Image Insert:
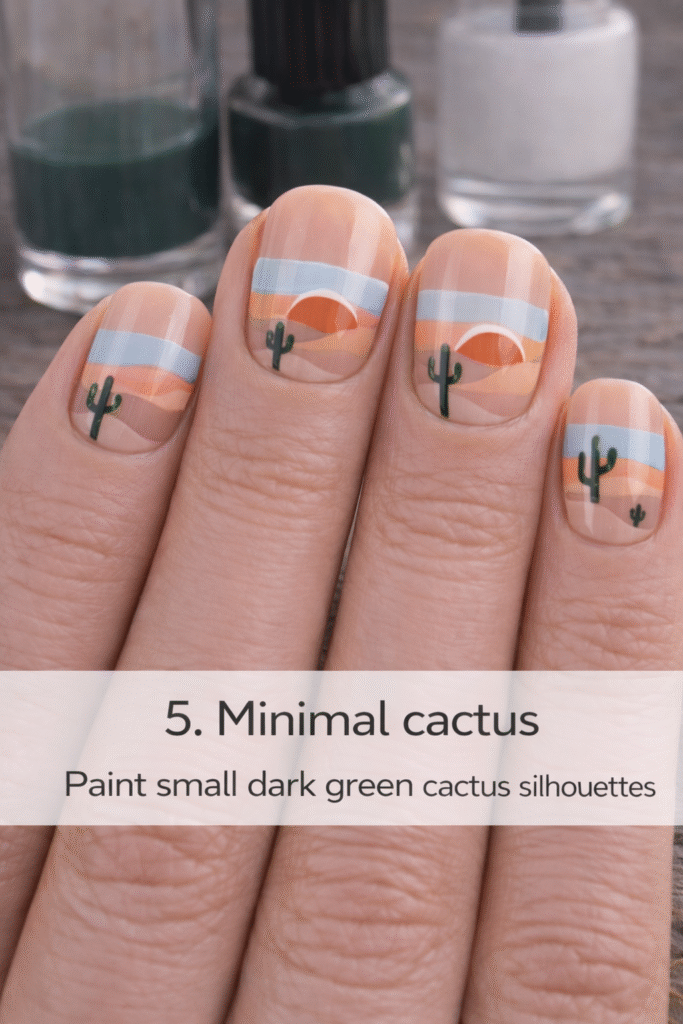
Step 5: Add Minimalist Cactus Silhouettes
This is where the camping vibe really comes alive.
Using a thin nail art brush and dark green polish, paint simple cactus silhouettes on select nails. Keep the shapes small and clean—thin vertical lines with one or two short arms are all you need.
Not every nail needs a cactus. Spacing them across the set keeps the look balanced and visually interesting.
Let this layer dry completely before sealing.
Image Insert:
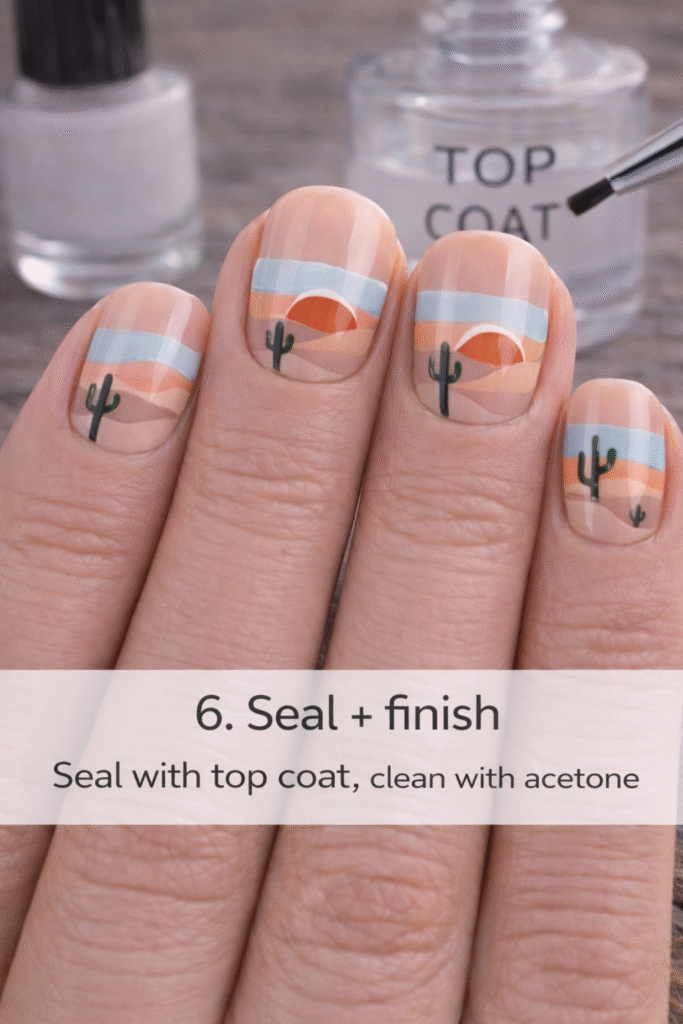
Step 6: Seal and Finish the Design
Once all artwork is fully dry, apply a glossy top coat to protect the design and enhance the pastel colors. Use a floating motion to avoid dragging the artwork.
For a more editorial or Pinterest-style finish, you can use a matte top coat instead—this pairs beautifully with desert tones.
Clean around the cuticles and edges using a small brush dipped in acetone for a professional finish.
Image Insert:
Best Practices for Desert Camping Nail Designs
- Use thin polish layers to prevent smudging
- Let each layer dry before adding the next
- Anchor your painting hand on a flat surface
- Keep details minimal—this style thrives on simplicity
- Practice cactus shapes on paper before applying
Design Variations & Alternatives
Want to customize this Camping Nail Design?
- Matte finish for a soft, boho editorial look
- Warm sunset tones using coral or burnt orange
- Night desert theme with dusty lavender skies
- Accent nails only for a subtler effect
- Western elements like stars or moons
Why Desert Camping Nail Designs Are Trending
Desert-inspired nails combine natural aesthetics, soft pastel color palettes, minimalist design trends, and travel-inspired visuals. These designs perform exceptionally well on Pinterest, Instagram, and lifestyle blogs because they feel calming, aspirational, and season-neutral.
Final Thoughts
This Aesthetic Desert Camping Nail Design proves that camping-inspired nails don’t need to be bold or busy to make an impact. With soft colors, clean shapes, and thoughtful layering, you can create a manicure that feels artistic, modern, and deeply connected to nature.
Whether you’re heading out on a road trip, planning a camping adventure, or simply love desert aesthetics, this design is versatile, wearable, and timeless.
0 Comments