Mountain & Forest Line-Art Camping Nail Design Tutorial
Nature-inspired nail art has evolved toward designs that feel calm, intentional, and wearable. Rather than relying on bold colors or heavy decoration, modern illustrated manicures focus on balance—using negative space, delicate line work, and muted tones to create designs that feel artistic without being overwhelming. This mountain and forest line-art camping nail design is a perfect example of that philosophy.
Inspired by hand-drawn landscape sketches, this manicure uses a sheer nude base, a warm ivory fade, ultra-thin mountain outlines, layered evergreen trees, and muted sage-green accent nails. The design feels quiet and thoughtful, making it ideal for everyday wear, seasonal transitions, and anyone who prefers subtle detail over high contrast.
What makes this design particularly effective is the order in which it is built. Each layer supports the next, and nothing is added prematurely. Following the steps carefully—and resisting the urge to overwork any one section—is what allows the finished nails to closely resemble the reference image.
Step 1 – Prep + Sheer Nude Base

Begin by shaping the nails into a soft almond shape. This shape mirrors the proportions seen in the reference image and provides enough vertical space for the illustrated elements without crowding the nail. Avoid overly sharp tips or exaggerated length, as both can make the design feel less balanced.
After shaping, gently push back the cuticles and cleanse the nail surface to remove oils. This step is essential for smooth polish application and long-lasting wear. Apply one thin layer of base coat, allowing it to dry fully, then follow with two thin coats of sheer nude or milky pink polish.
The base should remain translucent. You should still be able to see the natural nail through the polish. This negative space near the cuticle is not a shortcut—it is a deliberate design choice that keeps the manicure light and editorial rather than heavy.
Step 2 – Warm Ivory Fade

Apply a warm ivory or light cream polish beginning at the mid-nail and blending gently toward the tip. Use thin layers and light pressure to avoid harsh lines. The fade should transition seamlessly into the nude base rather than sitting on top of it.
This layer represents the ground of the landscape and sets the tonal warmth for the entire design. If the cream is applied too heavily or too cool-toned, the final result will look stark rather than soft. If needed, apply a second thin layer to build warmth, but stop before the nail looks opaque.
Allow the fade to dry completely before adding any line work.
Step 3 – Mountain Outlines
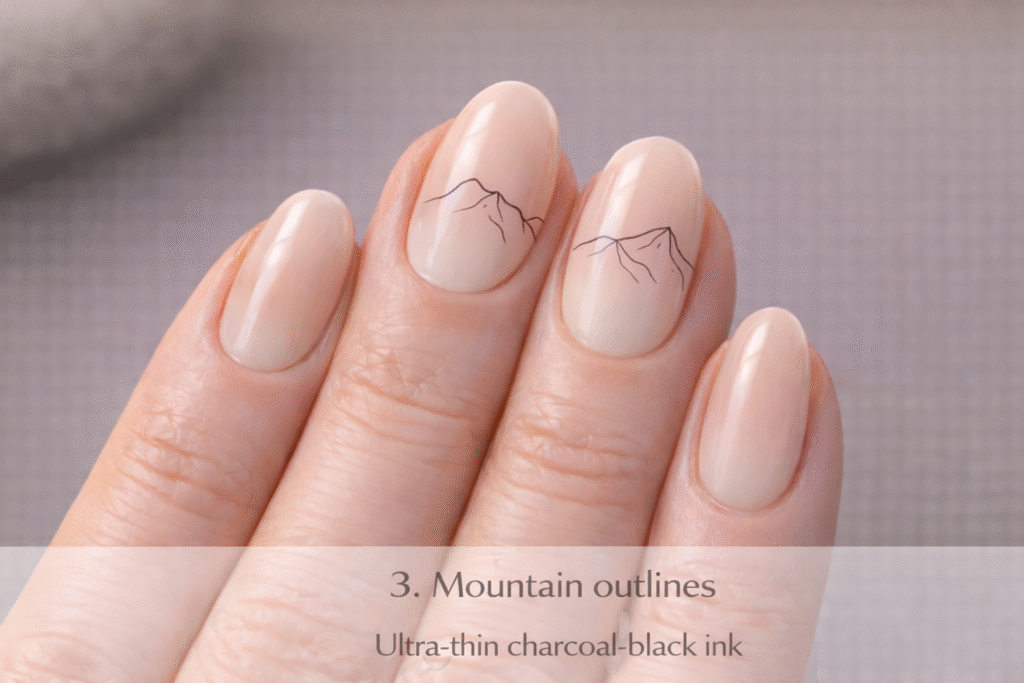
Using a fine liner brush and charcoal-black or softened black polish, lightly sketch mountain silhouettes just above the ivory fade. Think of this step as drawing with a pen rather than painting with polish. The lines should be thin, fluid, and slightly imperfect.
Avoid symmetry. Natural mountain ranges vary in height and spacing, and that irregularity is what gives the design its illustrated feel. At this stage, focus only on creating the basic outlines of the peaks. Do not add shading, texture, or interior lines yet.
If a line feels too heavy, lightly clean it up rather than adding more polish.
Step 4 – Mountain Detail
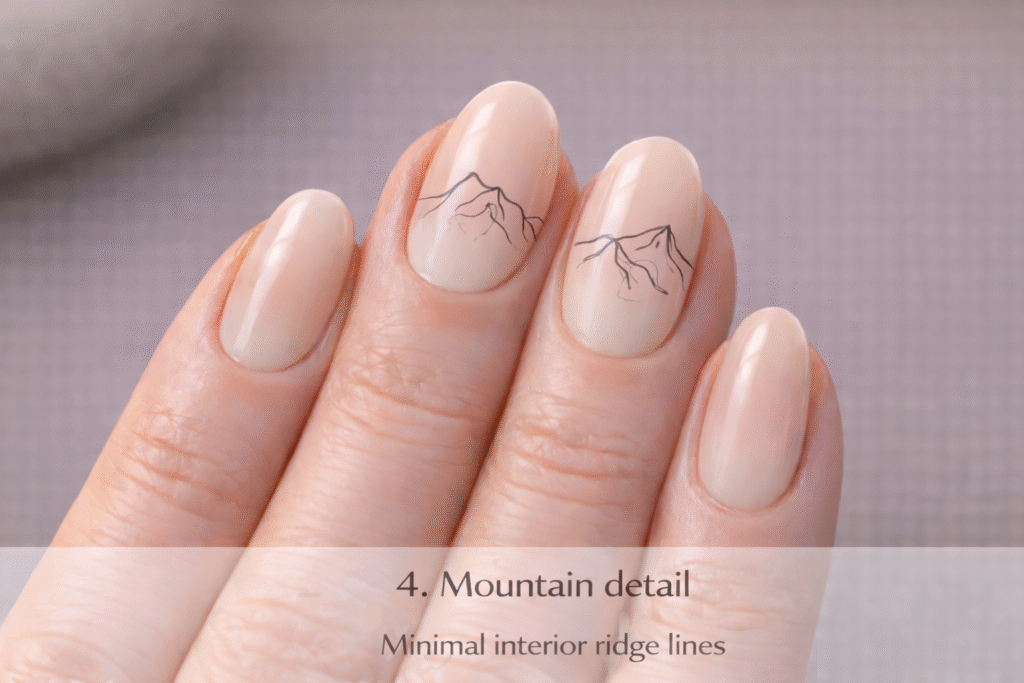
Return to the mountain outlines and add minimal interior line work to suggest ridges and depth. These lines should be short and lightly applied. Varying pressure slightly creates subtle differences in thickness that enhance the hand-drawn effect.
This step is where many designs go wrong. Adding too many lines or pressing too firmly can turn the mountains into bold graphics instead of sketches. When in doubt, stop early. The goal is suggestion, not realism.
Step 5 – Forest Layering
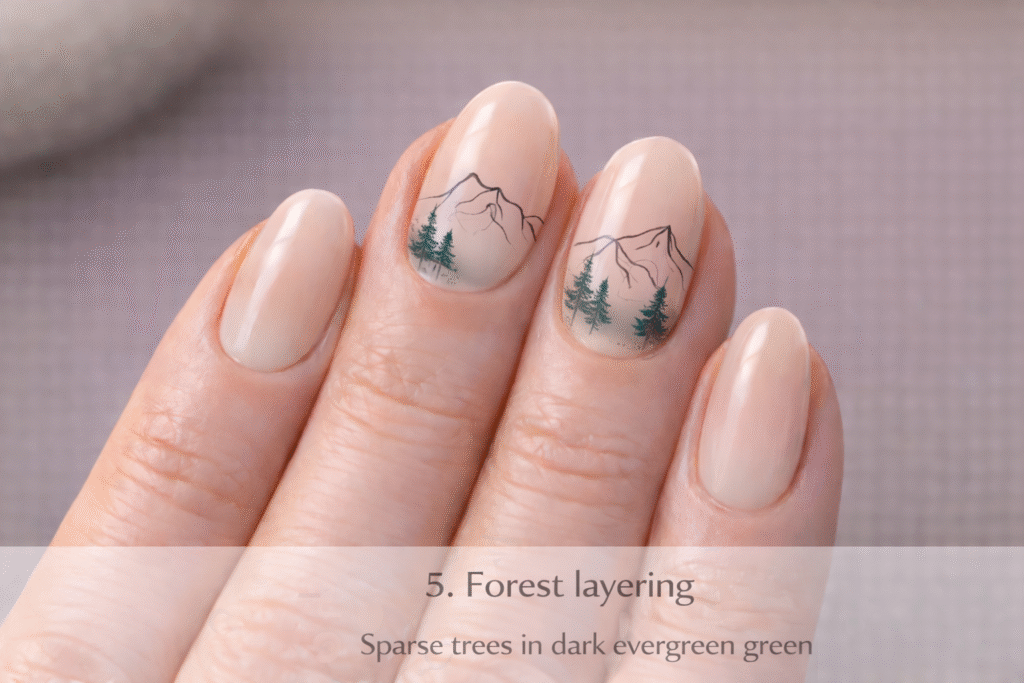
Using dark evergreen green polish, paint small tree silhouettes along the ivory base beneath the mountains. Start with lighter pressure and thinner trees to create background depth, then add one or two darker trees in the foreground.
Limit the number of trees to maintain negative space. This design relies on openness, and overcrowding the forest will make the nail feel busy. Vary height and spacing naturally rather than repeating the same shape.
Step 6 – Ground Texture
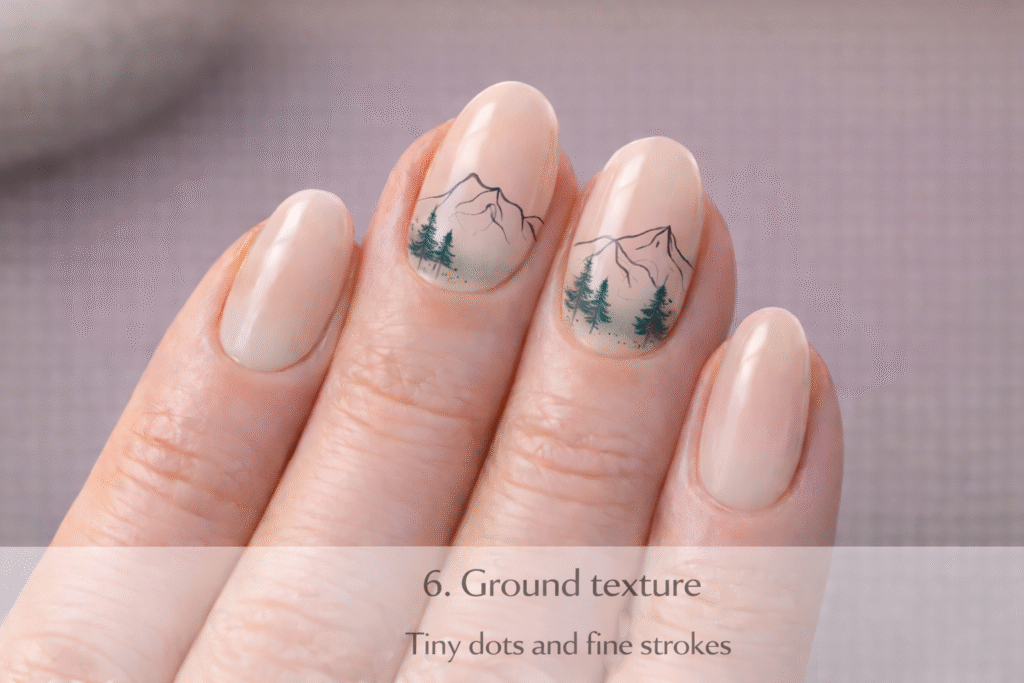
Add ground texture using a fine brush and minimal polish. Apply a few tiny dots and one or two short horizontal strokes near the base of the trees. These marks anchor the forest visually and prevent it from appearing to float.
This step should be barely noticeable. Overworking the texture will draw attention away from the mountains and trees.
Step 7 – Accent Nails

Paint two nails with a muted sage-green polish. Apply two thin coats for smooth, even coverage. These accent nails provide visual balance and reinforce the natural color palette without repeating the illustration.
Choosing a sage tone rather than a bright green keeps the design grounded and cohesive.
Step 8 – Seal + Finish
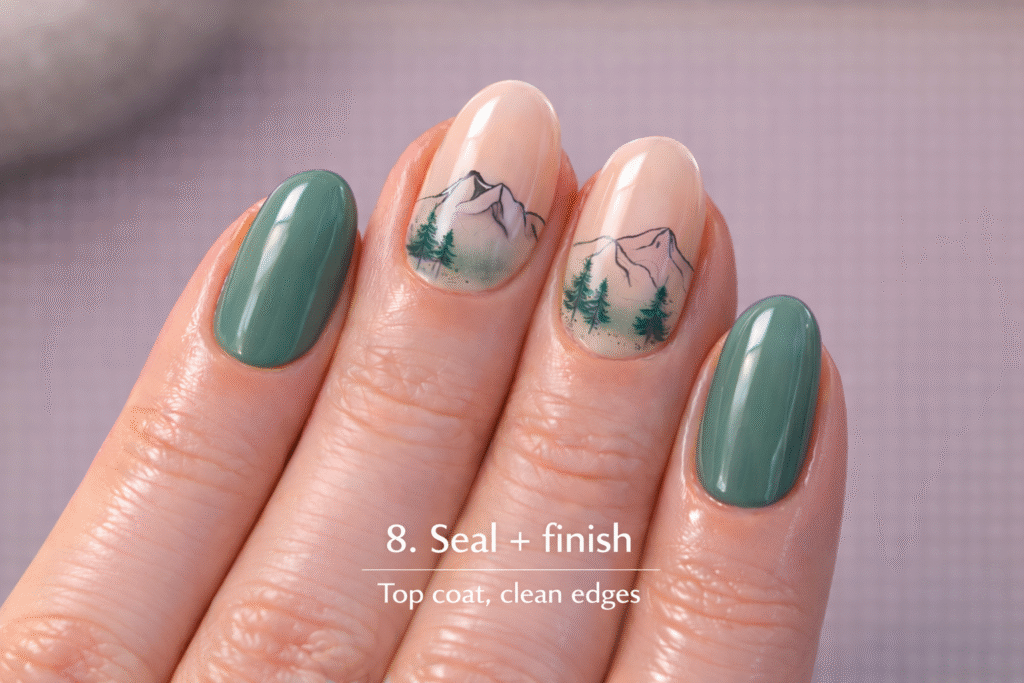
Finish the design by applying a glossy top coat using a floating motion to avoid dragging the artwork. Clean the edges with a small brush and remover for a polished finish. Allow the nails to dry fully before handling.
Final Notes
This mountain and forest line-art nail design succeeds because of restraint. Each element is placed intentionally, and nothing is added without purpose. When followed carefully, this process produces a manicure that feels illustrated, calm, and closely aligned with the reference image.


0 Comments