Imagine waking up to the smell of sizzling bacon, fluffy scrambled eggs, and golden-brown biscuits—all cooked in one magical pot over your campfire. That’s the beauty of a Dutch oven breakfast for camping. This cast iron wonder transforms your morning meal from sad granola bars into a feast that’ll make you the hero of the campsite.
Why Dutch Ovens Are Camping Breakfast Game-Changers
Let’s be real: cooking breakfast at camp can feel like trying to juggle flaming marshmallows. You’re working with limited equipment, unpredictable heat, and probably not enough coffee in your system yet. Enter the Dutch oven—the one piece of cookware that makes you look like a backcountry chef without the actual culinary degree.
Dutch ovens distribute heat evenly, which means no more burnt-on-one-side, raw-on-the-other disasters. You can cook directly over coals, hang them over a fire, or pile hot coals on the lid for oven-style cooking. It’s basically a portable kitchen that weighs about as much as a small boulder, but we’ll get to that.
The best part? You can cook massive quantities of food in one go. Feeding a crew of hungry campers becomes way less stressful when you’re not flipping individual pancakes on a tiny camp stove for forty-five minutes straight.
Essential Dutch Oven Breakfast Recipes That Actually Work
The Classic Campfire Scramble
A Dutch oven breakfast for camping doesn’t get simpler than this. Toss in chopped potatoes, onions, peppers, and whatever breakfast meat you’re craving. Let everything get nice and crispy, then pour beaten eggs over the top and stir until fluffy. Season with salt, pepper, and hot sauce to taste.
You can prep all your veggies at home and store them in containers or bags. Trust me, chopping onions before your first cup of coffee while sitting on a log is nobody’s idea of fun.
Dutch Oven Cinnamon Rolls
Here’s a secret: those refrigerated cinnamon roll tubes from the grocery store work perfectly for Dutch oven breakfast for camping. Line your Dutch oven with parchment paper, arrange the rolls inside, put the lid on, and surround it with coals. Twenty minutes later, you’ve got gooey cinnamon rolls that’ll make everyone forget you took a shortcut.
No shame in the store-bought game when you’re outdoors. You’re camping, not auditioning for a baking show.
Hearty Breakfast Casserole
Layer frozen hash browns, cooked sausage, cheese, and beaten eggs in your Dutch oven. Add diced bell peppers and onions if you’re feeling fancy. Cook over moderate coals for about 45 minutes, checking occasionally to make sure the bottom doesn’t burn.
This recipe is perfect for feeding a crowd because you literally just dump everything in and walk away. You can sip your coffee, enjoy the morning, and still serve up something that tastes like you worked hard.
Mastering Temperature Control With Your Dutch Oven
Temperature control sounds technical, but it’s actually pretty straightforward once you get the hang of it. The basic rule: for 350°F cooking, use twice as many coals as your Dutch oven’s diameter in inches. For a 12-inch oven, you’d use about 24 coals total.
Put more coals on top than on the bottom—roughly a 3:1 ratio. This creates an oven effect and prevents the bottom from burning while the top stays raw. For a 12-inch Dutch oven, that’s about 18 coals on top and 6 underneath.
Wind affects everything, so you’ll need to adjust. Breezy morning? Add a few extra coals. Cooking in a sheltered spot? You might need fewer. Pay attention to how your food’s cooking and make adjustments as needed.
The Rotation Trick
Every 15 minutes or so, rotate your Dutch oven a quarter turn in one direction and rotate the lid a quarter turn in the opposite direction. This prevents hot spots and ensures even cooking. Yeah, it’s a bit fussy, but it’s the difference between breakfast and charcoal.
Dutch Oven Breakfast For Camping: Prep Tips That Save Your Sanity
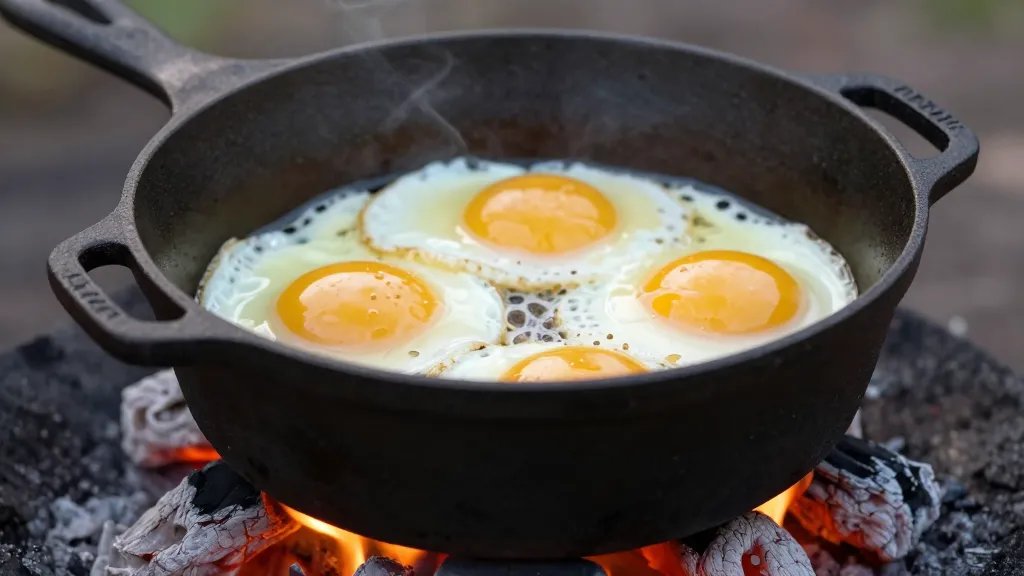
Preparation makes or breaks your Dutch oven breakfast for camping experience. Do yourself a favor and handle as much as possible before you leave home.
Pre-cook and crumble your bacon or sausage, then freeze it in bags. It’ll stay cold in your cooler and thaw by morning. Chop all your vegetables and store them in containers. Crack eggs into a sealed container or bottle so you’re not dealing with shells at camp.
Create breakfast kits for each meal. Put all the ingredients for one breakfast in a gallon bag with the recipe written on it. When morning comes, you just grab a bag and go. Your pre-coffee brain will thank you.
Season your Dutch oven properly before your trip. A well-seasoned Dutch oven is basically nonstick, which makes cleanup approximately one million times easier. Nobody wants to scrub stuck-on eggs off cast iron while kneeling in the dirt.
Packing Your Dutch Oven Smart
Dutch ovens are heavy, so pack them strategically. Put them at the bottom of your gear pile where they won’t crush anything. Some people use them as a storage container and pack soft items like clothes inside.
Line your Dutch oven with paper towels before packing to absorb any moisture and prevent rust. If you’re car camping, weight isn’t as big an issue. Backpacking? Maybe leave the 12-inch beast at home and bring a smaller 8-inch version.
Cleanup Without Losing Your Mind
Let’s address the elephant in the campsite: cleaning a Dutch oven can feel like a punishment. But it doesn’t have to be terrible if you follow a few rules.
Never use soap on a seasoned Dutch oven. Scrape out food debris while the pot is still warm (not hot enough to burn yourself, obviously). Pour in some hot water and use a stiff brush or chain mail scrubber to remove stuck-on bits.
Dry your Dutch oven thoroughly over the fire or coals. Any moisture left behind leads to rust, and rust is the enemy. Once it’s bone dry, wipe a thin layer of cooking oil all over the inside and outside surfaces.
Some folks line their Dutch ovens with aluminum foil or parchment paper for easy cleanup. Does this make purists weep? Probably. Does it work? Absolutely. Do what makes your camping experience better.
Common Dutch Oven Breakfast Mistakes To Avoid
Using too many coals turns your Dutch oven breakfast for camping into a cremation ceremony. Start with fewer coals than you think you need. You can always add more, but you can’t un-burn your food.
Don’t peek constantly. Every time you lift the lid, you lose heat and add cooking time. Trust the process and only check when necessary.
Forgetting to bring pot holders or heavy gloves is a rookie move that leads to burnt fingers. Cast iron gets wickedly hot. Protect your hands or prepare to develop some interesting new swear words.
The Soggy Bottom Problem
Too many bottom coals create a soggy, undercooked top with a burnt bottom. Remember that 3:1 ratio of top to bottom coals. You want heat coming primarily from above to create that oven effect.
If you’re cooking something wet like a breakfast casserole, elevate your Dutch oven slightly using rocks or a trivet. This allows air circulation and prevents the bottom from scorching.
Gear and Tools That Make Life Easier
A lid lifter is non-negotiable. These simple hooks let you safely remove the hot lid without dumping ash into your food or burning yourself. They cost about ten bucks and save you from disaster.
Invest in a good pair of heat-resistant gloves rated for high temperatures. Kitchen oven mitts won’t cut it. You need something substantial that can handle 400°F cast iron without transferring heat to your delicate human skin.
A charcoal chimney starter makes lighting coals way easier and faster than trying to start them individually. FYI, briquettes burn longer and more predictably than lump charcoal, making them better for Dutch oven breakfast for camping.
Bring a small whisk broom to dust ash off the lid before opening it. Nobody wants seasoned eggs with a side of gritty coal dust.
Frequently Asked Questions
Can I use my Dutch oven breakfast for camping setup on a camp stove?
Technically yes, but it’s not ideal. Most camp stoves can’t support the weight of a loaded Dutch oven, and the heat distribution won’t be as good as using coals. If you must, use a sturdy two-burner stove and keep the heat low to medium. The real magic happens with coals though, so if you have the option, go that route.
How do I know when my Dutch oven breakfast is done?
Visual cues help, but a quick-read thermometer is your best friend. Egg dishes should hit 160°F internally. Baked goods should be golden brown on top and spring back when touched lightly. With practice, you’ll develop a feel for timing based on your specific setup and conditions.
What size Dutch oven should I buy for camping breakfasts?
A 10 or 12-inch Dutch oven works perfectly for most camping groups. The 10-inch feeds 4-6 people comfortably, while the 12-inch handles 6-8. Bigger isn’t always better—larger ovens require more coals and are heavier to transport. Start with a 12-inch if you’re unsure; it’s the most versatile size.
Can I make Dutch oven breakfast for camping ahead of time and reheat it?
Absolutely! Breakfast casseroles, hash combinations, and even pancakes reheat beautifully. Cook everything at home, refrigerate, and warm it up over coals at camp. This works great for the first morning when you’re still setting up and don’t want to fuss with full cooking.
Do I really need a cast iron Dutch oven, or will aluminum work?
Cast iron is the gold standard for Dutch oven breakfast for camping because it holds and distributes heat incredibly well. Aluminum versions are lighter and easier to transport, but they don’t perform as well with coal cooking and hot spots are more common. IMO, if you’re serious about Dutch oven cooking, invest in cast iron.
How do I prevent my Dutch oven from rusting between camping trips?
Store it in a dry place with a light coating of cooking oil on all surfaces. Put a paper towel inside to absorb moisture, and don’t put the lid on completely tight—leave it slightly cracked to allow air circulation. Check it periodically and re-oil if needed. Proper storage means your Dutch oven will outlive you and probably your grandkids.
Wrapping It All Up
Dutch oven breakfast for camping elevates your outdoor cooking from “we survived” to “we actually ate well out here.” Sure, there’s a learning curve, and yes, you’ll probably burn something the first time. But once you nail it, you’ll wonder how you ever camped without one.
The key is starting simple. Master scrambled eggs and hash before attempting elaborate breakfast casseroles. Get comfortable with temperature control. Prep ingredients at home. And remember: even slightly burnt food tastes amazing when you’re eating it outdoors with good company.
Your campfire breakfast game is about to level up significantly. Just don’t blame me when everyone starts requesting you on every camping trip because of your Dutch oven skills.
0 Comments