Camping dutch oven recipes transform your outdoor cooking from boring hot dogs to restaurant-quality meals that’ll make your camping neighbors seriously jealous. This cast iron powerhouse turns your campsite into a legit outdoor kitchen, letting you bake, roast, braise, and simmer like a backcountry chef. Whether you’re new to dutch oven cooking or looking to level up your camping menu, these recipes and techniques will have you wondering why you ever bothered with that flimsy camping stove.
Why Your Camping Kit Desperately Needs a Dutch Oven
Look, I get it. Lugging around a heavy cast iron pot seems counterintuitive when you’re trying to pack light. But camping dutch oven recipes deliver results that justify every ounce of that weight.
A quality dutch oven basically acts as your portable oven, stovetop, and slow cooker all wrapped into one indestructible package. You can bury it in coals, hang it over flames, or stack multiple ovens to cook entire meals simultaneously. Try doing that with your lightweight titanium cookware.
The thick cast iron walls distribute heat evenly, preventing those annoying hot spots that turn your dinner into a charred mess on one side and raw on the other. Plus, these things last forever. Your great-grandkids will probably still be using the same dutch oven you buy today.
Essential Camping Dutch Oven Recipes for Beginners
Starting with camping dutch oven recipes doesn’t require culinary school credentials. These foolproof dishes build your confidence while feeding hungry campers.
No-Knead Campfire Bread
Nothing beats fresh bread at camp. Mix flour, salt, yeast, and water the night before. Let it sit in a sealed container overnight while you sleep. In the morning, plop the dough into your preheated dutch oven, cover it, and surround it with coals for 30-40 minutes.
The result? Crusty, bakery-quality bread that makes everyone think you’re some sort of outdoor cooking wizard. Spread butter on that warm slice and watch grown adults weep with joy.
One-Pot Campfire Chili
This classic camping dutch oven recipe practically makes itself. Brown your ground beef (or turkey, or keep it vegetarian), toss in beans, tomatoes, onions, peppers, and spices. Let everything simmer for an hour while you set up camp or explore nearby trails.
The beauty of chili is its forgiving nature. Forgot an ingredient? No problem. Added too much of something? Just balance it out. Chili doesn’t judge your mistakes.
Dutch Oven Breakfast Casserole
Start your camping day right with layers of hash browns, sausage, eggs, and cheese all baked together. Prep everything the night before in a disposable aluminum pan that fits inside your dutch oven. In the morning, just place the pan inside, add coals, and wait 30 minutes.
You’ll have a hot breakfast ready while your coffee percolates. That’s what I call efficient camping.
Advanced Camping Dutch Oven Recipes That Impress
Once you’ve mastered the basics, these camping dutch oven recipes showcase what’s really possible with cast iron and campfire.
Whole Roasted Chicken with Vegetables
Yes, you can absolutely roast an entire chicken at your campsite. Season a whole bird, stuff it with aromatics, and surround it with potatoes, carrots, and onions. Cook it low and slow with coals on top and bottom for about 90 minutes.
The result rivals anything from your home oven. The vegetables soak up the chicken drippings, and the skin gets perfectly crispy. Your camping neighbors will definitely wander over asking what smells so incredible.
Campfire Lasagna
This camping dutch oven recipe requires some planning but delivers serious wow factor. Layer no-boil noodles with sauce, ricotta, mozzarella, and your choice of meat or vegetables. The enclosed environment of the dutch oven steams the noodles perfectly while everything bubbles together.
FYI, individual foil packet lasagnas also work great if you’re cooking for a smaller group or want portion control.
Upside-Down Pineapple Cake
End your camping meals with dessert that looks like you transported it from a bakery. Melt butter and brown sugar in the bottom of your dutch oven, arrange pineapple rings and cherries, then pour cake batter over everything. Bake with more coals on top than bottom to prevent burning.
Flip it out onto a plate and watch jaws drop. Nobody expects gourmet desserts in the wilderness.
Temperature Control and Coal Management
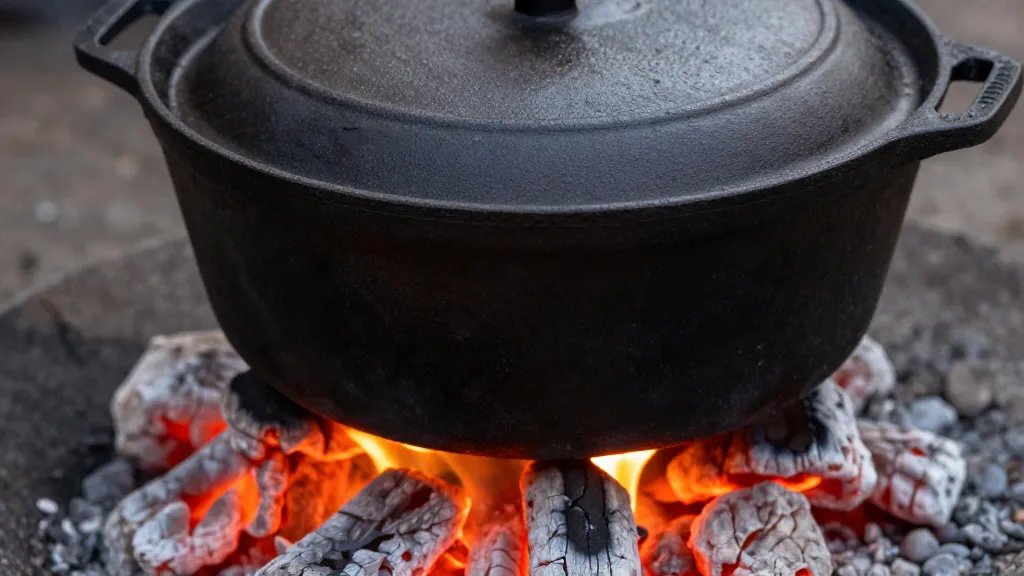
Mastering camping dutch oven recipes requires understanding heat management. Unlike your home oven with its precise temperature dial, campfire cooking demands attention and adjustment.
The general rule: each charcoal briquette adds roughly 25 degrees Fahrenheit. For a 12-inch dutch oven at 350°F, you need about 25 briquettes total. Distribute them with more on top than bottom for baking (17 top, 8 bottom), or reverse that ratio for frying or boiling.
Weather affects your coal count too. Wind, cold temperatures, and altitude all steal heat, so you’ll need extra briquettes in challenging conditions. Start checking your camping dutch oven recipes earlier than recipe times suggest until you learn how your specific setup performs.
Rotate your dutch oven a quarter turn every 15 minutes, and rotate the lid in the opposite direction. This prevents hot spots and ensures even cooking. Yeah, it’s a bit fussy, but perfectly cooked food makes it worthwhile.
Using Different Heat Sources
Charcoal briquettes offer the most controllable heat for camping dutch oven recipes. They burn consistently and you can count them for temperature accuracy.
Wood coals work beautifully once you develop the skill to judge heat levels. Let your campfire burn down to red-hot coals, then shovel them around your dutch oven. Wood coals burn hotter and faster than charcoal, so watch your food closely.
Propane camp stoves can also power dutch oven cooking, though you’ll lose that authentic campfire flavor. They excel for car camping situations where you want convenience over atmosphere.
Prep and Packing Strategies for Dutch Oven Camping
Smart preparation makes camping dutch oven recipes infinitely easier when you’re miles from the nearest grocery store.
Pre-measure and bag your dry ingredients at home. Label everything clearly because distinguishing flour from powdered milk in dim campfire light becomes surprisingly difficult. Mix your spice blends ahead of time too.
For car camping, prep entire meals in disposable aluminum pans that fit inside your dutch oven. Freeze them solid, and they’ll stay cold in your cooler while acting as extra ice. When dinner time arrives, simply transfer the frozen block into your preheated dutch oven.
Backpacking with a dutch oven? LOL, just kidding. Unless you’re seriously committed or have pack animals, save the cast iron for accessible campsites. Lightweight camping dutch oven recipes exist using smaller aluminum versions, but they don’t perform quite the same magic as traditional cast iron.
Essential Dutch Oven Accessories
A few tools make camping dutch oven recipes significantly easier:
- Lid lifter: Absolutely essential unless you enjoy burned hands and dumping ash into your food
- Long-handled tongs: For moving hot coals without singing your arm hair
- Heat-resistant gloves: Because grabbing hot cast iron with regular gloves ends badly
- Charcoal chimney starter: Gets briquettes ready faster and more evenly than lighter fluid
- Whisk broom: Sweep ash off the lid before opening to keep grit out of your food
- Trivet or metal stand: Keeps your dutch oven off cold ground that sucks heat away
Cleaning and Maintenance Between Recipes
Proper care keeps your dutch oven seasoned and ready for years of camping dutch oven recipes. The good news? Cleaning at camp is often easier than at home.
Let your dutch oven cool enough to handle safely, then scrub it with hot water and a stiff brush. Skip the soap unless you’ve got seriously stuck-on food. Dry it thoroughly over hot coals to prevent rust – any moisture left behind will turn into orange spots overnight.
Apply a thin layer of cooking oil while the dutch oven is still warm. The heat helps the oil penetrate and maintain that non-stick seasoning. Wipe away any excess to prevent sticky buildup.
For stubborn, burned-on messes, fill the dutch oven with water and boil it over your campfire. The heat loosens most crud, letting you scrub it away easily. IMO, this method beats scraping for an hour with inadequate tools.
Store your dutch oven with a paper towel inside to absorb any residual moisture. If you’re stacking multiple ovens, place cloth or paper between them to protect the seasoning.
Frequently Asked Questions
Can I use my home dutch oven for camping dutch oven recipes?
Most home dutch ovens lack the flanged lid design that camping versions feature. That flat lid on your kitchen dutch oven can’t hold coals on top, limiting your cooking methods to just bottom heat. Dedicated camping dutch ovens with rimmed lids let you pile coals on top for baking and roasting. If you already own a home version, you can still use it for camping stews and dishes that don’t require top heat, but investing in a proper camping model opens up significantly more recipe possibilities.
How do I prevent food from sticking to my dutch oven?
A well-seasoned dutch oven naturally develops non-stick properties over time and use. Before cooking camping dutch oven recipes, preheat your dutch oven and add adequate fat (oil, butter, or bacon grease). Don’t rush – let proteins develop a sear before trying to flip them, as they’ll release naturally when ready. If you’re new to your dutch oven, use parchment paper or aluminum foil as a liner until the seasoning builds up. Regular use and proper oiling after each cleaning gradually creates that coveted black, slick surface.
What size dutch oven should I buy for camping?
A 12-inch dutch oven serves 4-6 people comfortably and handles most camping dutch oven recipes without modification. It’s the goldilocks size – not too heavy for occasional moves around camp, but large enough for family meals. Couples might prefer a 10-inch model to save weight and fuel. Large groups or families should consider a 14-inch version, though it requires more coals and muscle to move. Many experienced campers eventually own multiple sizes for cooking different courses simultaneously.
How long do camping dutch oven recipes typically take to cook?
Cooking times vary wildly based on your heat source, weather conditions, and recipe complexity. Simple camping dutch oven recipes like stews or chili need 60-90 minutes. Baked goods typically require 30-45 minutes. Whole roasted meats can take 2+ hours depending on size. Always start checking doneness earlier than recipe instructions suggest until you learn how your specific setup performs. Altitude, wind, ambient temperature, and coal quality all affect timing significantly. Consider camping dutch oven recipes as guidelines rather than absolute rules, and invest in a good instant-read thermometer for meats.
Can I make vegetarian and vegan camping dutch oven recipes?
Absolutely! Dutch ovens excel at vegetable-forward dishes. Try ratatouille, vegetable curries, bean-based chilis, roasted root vegetables, or fruit cobblers. The even heat distribution makes dutch ovens perfect for cooking vegetables without turning them to mush. Many traditional camping dutch oven recipes adapt easily to plant-based versions by swapping proteins and using vegetable stock instead of meat-based broths. The cooking techniques remain identical whether you’re roasting a chicken or a cauliflower.
What’s the difference between a camp dutch oven and a regular dutch oven?
Camp dutch ovens feature three key differences: legs on the bottom, a flanged lid, and a wire bail handle. Those short legs lift the oven off the ground and create space for coals underneath. The flanged lid has a raised rim that prevents coals from sliding off when you pile them on top. The bail handle lets you hang the dutch oven over a fire or easily lift it with a lid lifter. Regular kitchen dutch ovens lack these features because they’re designed for stovetop and conventional oven use. While you can technically use a kitchen dutch oven at camp, you’ll find camping dutch oven recipes much easier with the proper equipment.
Conclusion
Camping dutch oven recipes elevate your outdoor cooking from survival mode to genuine culinary experiences. Sure, that cast iron pot adds weight to your gear, but the ability to bake bread, roast meats, and create layered casseroles at your campsite makes every ounce worthwhile.
Start with simple camping dutch oven recipes to build your confidence and understand heat management. Once you’ve nailed the basics, experiment with more ambitious dishes that showcase the dutch oven’s versatility. Your camping trips will never taste the same again, and you might find yourself planning adventures around meals rather than the other way around.
The learning curve exists, but it’s shorter than you think. A few camping trips from now, you’ll be confidently adjusting coals and timing multiple dishes like you’ve been doing it forever. Your dutch oven will become that essential piece of gear you wonder how you ever camped without.
0 Comments