I swear my mood drops the moment a fresh mani chips on the first day of a trip. Nothing kills a sunset selfie like peeling polish, and I’ve learned to plan for that sting.
I bring beauty outdoors with choices that behave like gear: compact polishes and trusty product items that deliver results without babysitting. I test colors like Treetop, a serene moss green from the ILNP Campground Collection, because it layers well and feels like a forest trail in a bottle.
My routine mixes practical trail habits with playful art prompts. Match one shade to a pine needle, trace a chrome tip like a ridge line, or echo a beach shell swirl. Small experiments save time and make nail art feel like part of the trip, not a task.
I pack only the items that earn their space, so I’m free to make a fire or chase a sunset. This approach keeps my look intentional, durable, and ready to tell a good story.
Key Takeaways
- Durable, compact product choices help polish last during outdoor time.
- Treetop polish from ILNP gives buildable color and salon-like results.
- Simple art prompts let curiosity guide creative, nature-inspired designs.
- Pack only the essentials so your routine stays fast and fuss-free.
- This method blends practicality with playful art for lasting looks.
When my nails chip on day one of camp, here’s the real problem I’m solving
A chipped tip within hours is my signal that my routine failed the outdoors test. I don’t want perfection; I want predictable wear that fits how I spend my time outside.
The tension is real: pretty manicures often lose to zippers, tent stakes, or skillet edges. I blamed rushed prep, thick coats that never cured, skipping edge capping, and ignoring abrasion that eats soft tips.
So I simplified into a tiny, tactical kit that fixes the main failure points.
- Wipes for clean adhesion and a compact file to smooth snags.
- A quick-dry top coat and cuticle oil for nightly recovery.
- A short list of steps I can do in five minutes, not an hour that steals daylight.
I treat each trip like an experiment: change one variable—coat thickness, dry time, or edge sealing—and watch how long my nail look holds by breakfast. I track which product and items survive the trail and which need reliable delivery before I leave.
My goal isn’t bulletproof polish; it’s a small, repeatable system that helps me enjoy the trip without fretting every time my hand hits a pocket.
The tension: cute nail art vs. real-life camping, dirt, and late-night s’mores
A pretty mani and a night by the fire rarely agree, and that clash defines how I pack.
The problem: glossy, thick layers look great in photos but pick up scratches and ash by sundown. I’ve cracked nail tips on cookware and scraped polish on a bear canister. Those shiny finishes turn into obvious chips fast.
Why glossy looks fail by the campfire
Glossy surfaces are slippery and show every abrasion. The mirror-like finish highlights ash and scuffs more than a matte or flexible top coat does.
“High shine with no edge seal is a chip magnet by nightfall.”
The trade-off I refuse to make: beauty outdoors without babysitting my nails
I won’t choose between beauty and the outdoors. Instead, I use techniques that let me cook, set stakes, and still enjoy nail art without hovering over my hands.
- I swap one ultra-gloss layer for two thin coats, then edge-cap and add a flexible top coat after chores.
- I pack one item per failure point: a wipe for oil, a file for snags, and a top coat for reinforcement.
- I shift from delicate decals to bolder accents away from high-impact edges so the design lasts longer.
| Problem | My Fix | When I Test It |
|---|---|---|
| Slippery, shiny finish | Two thin coats + edge capping | After pan use and tent setup |
| Quick chips at tips | Flexible top coat applied post-chores | Nightfall inspection |
| Oil and grime | Pre-pack wipes and a quick file | After cooking or gear handling |
My approach is curious, not rigid. I track time between coats and compare products to see what survives rope friction and backpack straps. Small scuffs are part of the look, and accepting that frees me to try adventurous art on the trail.
How I make camping nails personal without overthinking the rules
I learned to let the landscape set the rules, and my mani finally stopped feeling like homework.
I stopped copying complex salon trends and started matching the place I was in. That shift made my nails feel like mine again.
My starter list is tiny: pick one place, one feeling, one small technique. Then let the look change as you go.
I choose products and items based on how I move. If I’m on the road, I go minimal. If I stay put, I pack one extra accent to play with at sunset.
“Curiosity beats perfection—if a rock vein inspires me, that becomes my accent.”
| Style | When I Use It | Packed Items |
|---|---|---|
| Minimal matte | All-day hikes | Top coat, wipes, tiny file |
| Base-camp accent | Long stays at one place | One extra polish, oil, decals |
| Quick experiment | Picnic table touch-up | Mini brush, remover pad, quick-dry |
I borrow tips from fellow enthusiasts but rewrite them for the trail. Delivery timing also shapes my kit—if a bottle won’t arrive in time, I make a different pick.
I keep items I know I’ll use twice. That rule saves weight and keeps my choices honest.
Designing for curiosity: let nature pick the palette, I follow the trail
I start by holding my hand up to the view and choosing the shade that jumps out. That tiny act turns decision fatigue into a playful prompt and keeps my look tied to the moment.
Match your nail to the landscape, not your outfit. I pick one color per place and treat each stop as a micro-adventure. One day is river-gray; the next is pine-brown. I jot the shade name beside the campsite in my trail journal so the story layers across my hands.
Curiosity beats completeness. I pack only the items I need for that day—one bottle and a mini top coat—so painting stays fun, not a chore.
Prompts to try on-trail
- Hold your fingers to a rock or moss; pick the first color that feels right.
- Use bold tones near the cuticle and neutral tips to hide scuffs.
- Let tiny chips become patina—they echo lichen and stone and make the art feel lived-in.
| Prompt | Product | When |
|---|---|---|
| River rock gray | Fast-dry polish + mini top coat | Midday break by water |
| Pine-cone brown | One bottle, quick brush | Base-camp afternoon |
| Shell highlight | Thin metallic accent | Golden hour photo |
“The best part is how every place becomes a palette instead of a problem.”
Forest-core colors I actually wear: Treetop and the Campground Collection
When my hands meet moss, I want polish that looks like it belongs there.
Treetop is a serene moss green Studio Color polish inspired by trail floors and lichen-touched bark. The formula is buildable and buttery smooth, so two thin coats level out on their own and a third adds depth without bulk.
I wear ILNP Treetop because the color reads like the woods, not a runway. It softens visible grime and keeps my hands feeling part of the scene on early fall hikes. The Campground Collection pairs four earthy Studio Color shades that echo bonfires, river stones, and s’mores, so my look stays calm and cohesive.
Treetop: a serene moss green that looks like it grew there
The sweet spot for application is 2–3 thin coats. I cap the free edge after coat two, then finish with a light top coat. This routine turns tip wear into a gentle fade instead of a sudden chip.
Campground vibes: earthy, early-autumn tones that calm the whole look
Studio Color polishes are made for enthusiasts at any level, so painting by headlamp or at a picnic table feels forgiving. My items list stays short: one Campground bottle, a compact top coat, and a mini file. Everything else stays home.
Application sweet spot: why 2-3 coats give me salon-quality results
“Two thin coats build color; a third gives depth without slowing dry time.”
| Feature | Why I use it | Practical tip |
|---|---|---|
| Treetop shade | Blends with trail grime, reads natural | 2 thin coats + edge cap |
| Campground Collection | Earthy palette for fall trips | One bottle per trip |
| Studio Color formula | Buildable, smooth application | Reorder before trip for delivery |
Yeehaw but make it camp: Western sets that go from rodeo to ridge line
I love a little Western sparkle that reads bold in photos but behaves on the trail. This is how I balance glam with grit.
Simple sets work best: one earthy base, a chrome accent, and a single star per hand. That keeps the look country-core without creating a maintenance mess.
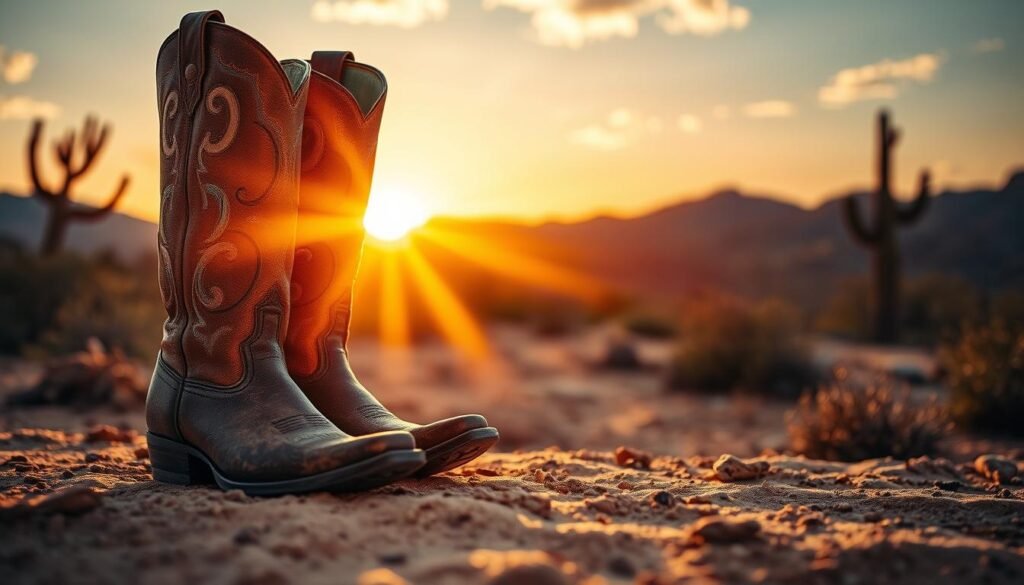
Chrome tips and stars for a country-core summer without fuss
I place stars near the cuticle where wear is gentler. Chrome tips echo spurs and ridge lines while leaving tips free to handle rope and cookware.
Earthy tones with a lil’ glitter dust when the sun hits your tent
On warm summer evenings I pick sun-baked browns and soft golds. A dusting of micro-glitter reads like campfire sparks in a picture, not a glitter bomb.
“Pick one Western element and let the rest be quiet—your hands will last longer and look intentional.”
- I pack one chrome topper, a mini detail brush, and a neutral base—no bulky items.
- Snap a golden-hour picture to tweak placement the next night.
- Reorder accents early so delivery arrives before peak season sells out.
| Element | Placement | Why it works |
|---|---|---|
| Star accent | Near cuticle | Less tip abrasion, playful detail |
| Chrome tip | Accent finger or two | Reflects light, reads like metal without heavy glitter |
| Earthy base | All nails | Blends with dust and hides small chips |
My minimalist trail kit: items I pack and the ones I don’t
Packing for a weekend outside forces me to choose only what truly earns its pocket space. I keep decisions tight so I spend less time fussing and more time enjoying the scene.
The tiny list that does the most
- Snack-size bag: one neutral polish and a fast-dry top coat.
- Alcohol wipes for prep and a mini file for quick snags.
- Cuticle oil in a leak-proof pen for tent-side bedtime care.
- A backup wipe tucked in my cook kit for the inevitable post-dinner touch-up.
I label bottles with a dot for “day paint” or “night touch-up” so I don’t fumble at dusk. I pack polishes that level fast and don’t rely on perfect light.
Weight vs. payoff: the products that earn their place
I track which items I use twice per trip. Anything that fails that test stays home next time.
- I compare each product by weight and real-world payoff. If a bottle adds bulk but not time savings or better wear, it goes.
- If delivery timing slips, I swap to backup neutrals rather than panic-buy a whole new set.
- Curiosity guides me: I test one change per trip and remove anything that didn’t prevent chips or save minutes.
“Fewer choices mean I actually paint instead of debating.”
Step-by-step application that survives a weekend outdoors
A weekend-ready mani has to survive real use, not just look cute for a photo. The tension is speed versus durability: fast application wins time, but thin prep and sloppy edges invite chips. I built a routine that balances both.
Prep that matters at camp: quick clean, dry, seal
I start with a wipe to remove oil, then air-dry fully. Skipping the dry step is the fastest way to sabotage a camp manicure.
I keep alcohol wipes and a mini file in a zip pocket so my items are always within reach.
Layering with intention: thin coats, quick cures, edge capping
My layering is thin-thin-top: two sheer coats that cure fast, capping edges lightly after each pass to build a flexible barrier.
I wait the length of a song between coats; in camp, that timing habit helps results more than fancy tools.
Fast fixes in low light: headlamp hacks and quiet-hour touch-ups
I use a headlamp set to warm mode to spot streaks without attracting bugs. I paint my non-dominant hand first while patience is highest.
If I nick a nail on a zipper, I file the snag, then float a drop of top coat on the edge to stop peeling.
“I test one change per trip—longer dry time, different cap angle, or a new brush—to see what pays off most.”
- I prefer polishes that self-level; they hide an uneven picnic table surface.
- Delivery windows matter—if a new top coat won’t arrive before my trip, I pack my proven combo.
Durability tactics I swear by when the trail gets rough
Scrapes and grit reveal what actually matters: application, timing, and a tiny kit that does the work.
I keep fixes practical and repeatable. When gear rubs against my hands or a pot edge nickers a tip, I rely on technique over more bottles. These moves save time and deliver the kind of results I can trust on a multi-day trip.
Edge-sealing trick that stops tip wear
I cap edges at a 45-degree angle so the top coat wraps the free edge without pooling. That wrap reduces tip chips dramatically.
I also carry a mini file for quick triage to erase rough spots before they catch on fabric or gear.
Top coat timing that resists scrapes
I apply my final layer after heavy lifting—tent setup and cookware scrubbing—so the fresh finish faces fewer scrapes. Timing the top coat this way extends wear more than a thicker coat ever would.
If a delivery delays my favorite product, I swap to a backup top coat with a similar brush so my application stays consistent.
Oil before bed under the stars
At night I add cuticle oil to keep the nail plate flexible. That small step reduces micro-cracks that become chips by morning.
When conditions get messy, I accept micro-scuffs and favor a satin finish. It hides wear better than blinding gloss and fits the outdoors mood.
- My predictable product pairing: neutral base, reliable top coat, and oil.
- I test painting night-before vs. morning-of; dew and temperature usually decide the winner.
- I keep a short list of what worked on each trip so I repeat the best combo next time.
| Tactic | Why it helps | When I use it |
|---|---|---|
| 45° edge cap | Wraps tip, prevents chips | After second thin coat |
| Top coat post-chores | Fewer scrapes, longer wear | After tent & cookware tasks |
| Bedtime oil | Keeps plate flexible | Every night on trip |
| Mini file | Quick triage for snags | Immediate fix in camp |
“Small, consistent habits beat extra products when you’re on the move.”
Colors by season and place: summer beach to fall forest
My palette changes with the map: bright shorelines or shadowed pines. I pick one small set per season so my look feels like it belongs to the place, not just my bag.
Summer sets for the beach and late sunsets
For warm days by the shore I reach for soft sand neutrals and shell-pink glints. These shades read well against swims and late sunsets.
Tip: place a bold accent near the cuticle to hide tip wear and keep the look fresh longer.
Fall shades that echo pine, bark, and ember
Come fall I swap to pine, bark, and ember tones that blend with leaf litter and wood smoke. Deep, muted shade choices hide small scuffs and feel lived-in.
- I carry one beach bottle and one fall bottle so I can pivot if the weather flips mid-trip.
- I test how each product reads in bright sun versus shade, then adjust placement accordingly.
- I swap a single polish each season to learn without replacing my whole kit.
“Pick a color from the trailhead sign and a second from driftwood—wear them as a two-finger story.”
I watch for small seasonal deals to restock staples so delivery lands before busy weekends. The goal is harmony with nature, not matchy-matchy perfection. These simple choices keep my routine flexible and fun.
Pictures or it didn’t happen: how I shoot nails outdoors
I chase light and texture, not perfection, when I frame my hand in the wild. That approach keeps photos honest and fun. I lean on simple tools and the landscape to tell the story.
Use nature as your backdrop: moss, bark, river rock
Anchor shots with texture. I press a fingertip to moss, rest my hand on bark, or balance on a river rock so the polish reads like it belongs in the scene.
Small props work, too. A bandana or a tin mug adds context without stealing focus. I wipe fingerprints off bottles and caps before I include them.
Golden hour angles that make colors pop
I shoot at golden hour and angle my hand about 45 degrees to the light. That makes the color jump without harsh glare.
Quick list I keep in my notes: one close detail picture, one wide landscape shot, one movement photo to show how the polish holds up in real time.
“A single accent nail gives the viewer somewhere to land. It makes the frame read clean and intentional.”
- Try the same angle with bark, then stone, then water to see what flatters the art most.
- Raise exposure slightly in low light to save editing time and keep color true.
- If delivery delays a new shade, reshoot with a tried product and note changes for next time.
Final tip: keep sessions short. Spend a few minutes, capture the picture, then enjoy the view. That balance of time and curiosity makes photos feel effortless and real.
Price, deals, and the real cost of results on the road
Money matters when gear space and time are limited. I worry about price because every ounce and minute counts on a trip. My choices balance upfront cost with real-world payoffs so I can pack light and still get usable results.
When to splurge on polish vs. save on tools
I splurge on polish formulas that deliver consistent wear and save on extras I won’t carry. A reliable product that adds a day of wear often pays for itself compared with cheap polishes that chip fast.
I skip bulky lamps and luxury files that sit in my kit. Instead, I invest in one fast-dry top coat and a compact bottle I trust.
Seasonal deals and set bundles that make sense
I watch seasonal deals and buy small sets that fill real gaps in my palette. Sets are worth it when they match my core shades; they’re not when they duplicate what I already own.
Reading reviews for wear-time helps me avoid impulse purchases. I save the most useful reviews that mention outdoor wear and real delivery timing.
Free shipping thresholds and delivery timing before a trip
I set reminders for free shipping thresholds so I hit the minimum before a long weekend. If delivery looks tight, I default to my backup kit rather than risk a day-one scramble.
| Decision | Why it matters | My rule |
|---|---|---|
| Splurge on polish | Longer wear, fewer touch-ups | Buy one reliable bottle over two unknowns |
| Save on tools | Less weight, less clutter | No bulky lamps; pack compact top coat |
| Set bundles | Better value if curated | Choose sets that fill palette gaps |
| Free shipping | Ensures on-time delivery | Plan orders to hit thresholds before trips |
- I compare price to field results: if a budget top coat adds a day of wear, it becomes a staple.
- My list includes total trip cost of ownership—bottles, wipes, oil—so I know true cost per weekend.
- Curiosity test: I buy one premium, one mid, one budget and rotate them to see what earns repurchase.
“Time saved by a fast-dry polish often outweighs a small price difference when you’re racing daylight.”
Reviews that matter: filter what people say for trail-tested proof
Most reviews praise color, but few describe real-world wear under hard use. That noise makes shopping confusing when you need a bottle to behave outdoors.
I look for wear-time, not just a pretty picture. A single clear note on day counts or tasks matters more to me than vague praise.
Look for wear-time, not just color praise
I scan reviews for specific behaviors—cooking, hiking, paddling—because that’s where nails fail most.
I trust people who include day counts, task lists, and whether they capped edges. Those details are actionable.
Real results in outdoor photos vs. studio pictures
Outdoor pictures—hands on bark, rock, or gear—show scuffs and texture that studio shots hide.
I flag product notes mentioning dry time in real conditions. Bench tests mean less when sun, sweat, and smoke exist.
“A single detailed field review beats ten vague five-stars when you’re packing to a deadline.”
- I note which items repeat across the best reviews, then try one at a time to isolate what helps.
- I weigh a nail enthusiasts’ long-form test higher than many short comments.
- I always check delivery notes—late arrivals or breakage matter when you need a bottle before a trip.
My curiosity prompt: after each trip I write one short field review with a photo and three bullets—what worked, what chipped, what I’ll change. Over time that mini-library outperforms star ratings.
| Filter | What I look for | Why it matters |
|---|---|---|
| Behavior details | Cooking, hiking, paddling mentions | Shows real stress points for wear |
| Outdoor picture | Hand on bark/rock/gear | Reveals scuffs studio photos hide |
| Delivery notes | Broken bottle or late arrival | Impacts packing and timing |
Rings, bands, and tiny accents that elevate campfire beauty
I let a single ring do the styling so my hands stay useful and photo-ready. Tiny metal details add polish without adding work. They frame the colors on your fingers and make a subtle statement in low light.
Metal tones that flatter earthy polishes
Warm brass pairs beautifully with pine and bark tones. It reads like worn metal and feels at home next to muted greens and browns.
Silver bands pop against mossy shades and give contrast in a soft flame. I wear one band per hand so I can cook, tie knots, and wash up without fuss.
Low-fuss accents: a single star, a chrome tip, a subtle decal
A single star decal or a chrome tip elevates the whole look without inviting high-maintenance chips. Less is more; one small accent reads well in a close-up picture and holds up during activity.
I pick product finishes that won’t snag gloves or sleeves and keep a tiny ring bag in my pack so metal doesn’t clink with my cook items. If a new accent won’t arrive before departure, I rely on my tried band and focus on polish placement instead of late delivery drama.
“Style one hand with a ring and leave the other bare—compare the picture and you’ll see which feels truer to the moment.”
- I pair warm brass rings with pine and bark tones; silver bands pop against mossy greens without stealing the show.
- I keep items minimal—one band per hand—so I can still cook, tie knots, and wash up easily.
- A single star decal or a chrome tip is enough to elevate campfire beauty without inviting high-maintenance chips.
- I test how colors read under flame light and pick metals that enhance rather than compete.
- Delivery note: if a new accent won’t arrive on time, I revert to my tried-and-true band and focus on polish placement.
| Accent | Why I use it | Trail-proof tip |
|---|---|---|
| Warm brass ring | Complements earth tones | One band per hand; wipe before photos |
| Silver band | Gives contrast to greens | Place on index or middle for balanced photos |
| Star decal / chrome tip | Subtle focal point | Keep to one nail to reduce chips |
| Small ring bag | Protects metal and kit | Store with wipes to keep shine |
Family and friends around s’mores: fun sets everyone can wear
We crowd the picnic bench and make s’mores into a tiny mani party that everyone can join. It turns a snack break into a shared moment without slowing the stories or the sing-along.
Five-minute marshmallow manicures for kids
I keep the setup fast and kid-safe: one quick-dry neutral, a soft file, and an alcohol wipe. I paint thumbs only for the youngest campers so it’s quick, tidy, and survives sticky s’mores.
I avoid tiny tools that create a mess and choose a product that dries in minutes. That way no one misses the fire songs.
Group color stories that look good in night photos
We pick a shared palette—ember, bark, and sky—so the whole crew reads as a set in lantern light. Each person chooses a camp object to match: mug green, tarp blue, or marshmallow cream.
“The best part is how the shared palette becomes part of the memory.”
- I pack just enough items for the group and check delivery a week ahead to restock decals if needed.
- We snap a quick picture under the lantern and angle toward the fire for warmth; at the beach we swap to sand and shell tones.
Order to camp: plan your products, shipping, and pack time
Nothing ruins a weekend faster than an order that arrives a day too late. I start every trip by treating my polish plan like gear: if delivery is uncertain, the bottle stays on the shelf.
Delivery buffers so your items arrive before departure
I set a delivery buffer of five business days for anything I need at camp—no buffer, no pack. That margin lets carriers slip a bit without forcing last-minute swaps.
I watch local carrier patterns and shift orders earlier during peak seasons. If shipping dates don’t line up with free shipping or a promo deal, I pick what I already own instead of risking a late arrival.
My pre-trip checklist: shades, top coat, remover, wipes
My compact pre-trip list keeps packing quick and predictable. I pre-label shades by trip so I don’t waste time at the trailhead.
- Shades (one main bottle + one accent)
- Top coat, remover pads, alcohol wipes
- Mini file, cuticle oil, zip pouch (a product “go bag” that never unpacks)
- Block 15 minutes of pack time specifically for nails and checks
Curiosity prompt: try a seven-day vs. five-day delivery buffer and note which reduces stress for your route.
“Plan it, pack it, forget about it until it’s time to shine.”
| Task | Why it helps | When I do it |
|---|---|---|
| Set 5-day buffer | Absorbs carrier delays | At order time |
| Compare shipping vs. free shipping | Gets items on time without extra cost | Before checkout |
| Pack product “go bag” | Always half-ready; saves time | Keep packed between trips |
| Wrap and verify caps | Prevents leaks and breakage | Final 15-minute check |
Camping nails
My ideal trail mani starts with a single rule: design that survives movement. I resolve the glam-versus-grit tension by choosing palettes and placement that work with the land, not against it.
I keep things minimal and purposeful. From the first swipe I think about outdoors wear, pick a nature-first shade, and place any accent where it will see the least abrasion.
I carry only the product and items that earn pocket space. Short steps, reliable tools, and a simple ritual give consistent results so I can focus on the day’s hike or paddle.
My mantra: chips are trail notes, not failures. When the base color mirrors the terrain, small wear reads like patina instead of damage.
“One shade per place, one accent per hand, one tweak per trip.”
- If delivery misses, I default to backup neutrals and keep the ritual.
- This method scales from backcountry to beach without a full kit swap.
- Best photos come when I stop chasing perfect and chase the light instead.
What I’ll remember when the fire dies down
When the last embers glow, I hold a quiet picture of that night’s colors in my head.
I remember hands that matched the landscape and told the story of each place I camped. I hear s’mores laughter, see quick fixes under a headlamp, and smile at tiny chips that read like stardust after long nights.
I replay summer dust on a brass ring and a beach morning when my polish caught the sun. I value how little time the ritual took because the product and items were chosen with care.
Most of all, curiosity did the heavy lifting—one prompt at a time. The tension between glam and grit turned into perspective: beauty outdoors is simpler, and each trip teaches one small lesson I’ll pack for next time.
FAQ
What makes these outdoor-friendly nail looks different from regular salon styles?
I design them to balance pretty polish with real-life wear. That means I pick tougher formulas, fewer fragile embellishments, and colorways inspired by nature so chips read like patina instead of damage.
How can I stop polish from chipping on day one of a trip?
I focus on prep and sealing. Clean nails, thin base coats, two even color layers, and an edge-capping top coat. Let each layer dry briefly and finish with a fast-dry top coat to lock edges—those steps cut early chips dramatically.
Why do glossy, salon-perfect finishes often fail around a campfire?
High-shine surfaces show every nick from gear and flames. Heat, smoke, and rough contact highlight imperfections. I prefer finishes and application techniques that resist scratches and let natural textures work as part of the look.
Can I still do cute nail art without spending time babysitting my manicure outdoors?
Yes. I use minimal accents—single stars, chrome tips, or tiny decals—and place them where they won’t snag. Simple contrasts and one accent nail give impact with almost no upkeep.
How do I pick colors that feel like the place I’m visiting?
I let the landscape lead. Match nails to dominant hues—mossy greens for forests, warm ambers for fall trails, and sandy neutrals for beaches. One shade per place keeps things personal and low-fuss.
What are a few forest-core shades you actually wear and recommend?
I wear a serene moss green and a set of early-autumn earth tones that read like bark and ember. They hide light wear, pair with rings, and keep photos looking cohesive after a long day outdoors.
How many coats should I apply for salon-quality results that last outdoors?
I aim for 2–3 thin coats: base, two color layers, and a top coat if needed. Thin coats dry faster and bond better, which is essential when I’m packing light and need a reliable finish.
What should I pack in a minimalist trail nail kit?
I bring one color, a clear top coat, nail wipes, cuticle oil, a compact file, and remover pads. Those items are lightweight and cover most fixes without bulk.
Which products earn their place in my pack when weight matters?
A durable top coat and a good file give the best payoff. Polishes are replaceable, but a reliable top coat prevents most field failures, so I never skip it.
What quick prep do I do at camp before painting?
I clean nails with a wipe, ensure they’re dry, lightly buff to remove shine, then apply thin layers and seal the free edge. Quick, intentional steps make a big durability difference.
Any low-light hacks for touch-ups by headlamp or campfire?
Yes—use a small LED headlamp for even light, keep thin brushes for control, and rely on a fast-dry top coat to hide imperfect edges. Less is more in low visibility.
What durability tricks do you swear by when the trail gets rough?
Edge-sealing every manicure, timing the top coat so it bonds, and applying cuticle oil at night all help. Those habits prevent tip wear and keep color looking fresh longer.
How do I choose seasonal colors that suit beach days and forest hikes?
For summer and beach trips I lean toward sun-warmed neutrals and soft corals. For fall, I pick deeper pines, burnt siennas, and ember shades that echo the season’s tones.
How do you photograph nails outdoors so colors pop?
I use natural backdrops like moss or river rock, shoot during golden hour, and choose angles that let texture and sheen show. Simple props and natural light make photos feel authentic.
When should I splurge on polish versus saving on tools?
Spend on long-wear formulas and a great top coat; save on extras like bulky kits. Tools like a good file and remover pads are inexpensive but essential for on-the-go fixes.
How do I read reviews to find trail-tested products?
Look for wear-time reports and outdoor photos rather than studio shots. Reviews that mention real activities—hiking, cooking, campsite chores—tell you more about actual performance.
What jewelry pairs best with earthy outdoor polishes?
I pick metal tones that complement the shade—brass or muted gold for warm earths, and oxidized silver for forest greens. Simple rings and a single accent piece keep the look cohesive.
Any quick, kid-friendly manicure ideas for a family night by the fire?
I do five-minute marshmallow manicures: one base color plus a tiny white marshmallow dot on an accent nail. Kids love the theme and it’s fast to apply and maintain.
How far in advance should I order supplies before a trip?
I build in a delivery buffer of at least a week. That gives time for any delays and lets me test a shade once it arrives so I’m not guessing on departure day.
What’s on my pre-trip nail checklist?
I pack my shades, top coat, remover, wipes, a file, and cuticle oil. I also confirm shipping dates and have spares for longer trips so I’m not stranded without basics.
How do I let chips become part of the art instead of a problem?
I choose earthy tones and embrace subtle wear as patina. Light chips can look intentional if the base color and finish are cohesive with the surroundings.
What small accents elevate a low-fuss outdoor manicure?
A single star, a chrome tip, or a tiny decal on one nail goes a long way. Those accents add personality without increasing maintenance during trips.
0 Comments