At the end of a long hike, the smell of melting cheese and browned ground beef brings me home. I make this recipe by a camp stove, and it folds nostalgia and practical camping sense into every spoonful.
It cooks in a single pot, uses simple real ingredients, and finishes in about 30 minutes. I brown meat, sauté mirepoix and garlic, add a flour roux, deglaze with chicken broth, and simmer pasta until al dente. Then I pull the pan off the heat, stir in milk and freshly shredded cheddar, and add a splash of pickle juice for that classic cheeseburger note.
This meal feels like comfort for the crew after a long day. It travels well in a cooler, cleans up fast, and stretches for family portions. When leftovers cool, I loosen them with broth or cream for silky reheats.
Key Takeaways
- Camp-ready comfort that cooks fast on a camp stove.
- Real ingredients: mirepoix, flour roux, chicken broth, milk, and sharp cheddar.
- Shred cheese at camp and add off heat to avoid graininess.
- Pickle juice or vinegar brightens the cheeseburger flavor.
- Easy cleanup with minimal gear and water use.
Why I Make This Cozy Cheeseburger Soup On Tent Camping Trips
When the tents are pitched and the camp stove is lit, I want dinner that won’t slow the group down. This recipe hits that comfort mark while staying efficient on a camp burner.
It comes together in about 30 minutes: browning meat takes 5–7 minutes, sautéing aromatics 5–10 minutes, and simmering pasta 5–8 minutes. That timing keeps my active work to just a few minutes at each stage so I can check kids, refill water, or tend the fire.
I rely on steady medium heat from a reliable camp stove. The method rewards basic gear and steady flame, so I don’t need fancy tools to get a rich, creamy finish.
- Fast minutes to feed the whole family when daylight fades.
- Easy cleanup and low fuel use with a single cooking vessel at camp.
- Flexible with proteins like beef, chicken, or plant-based options.
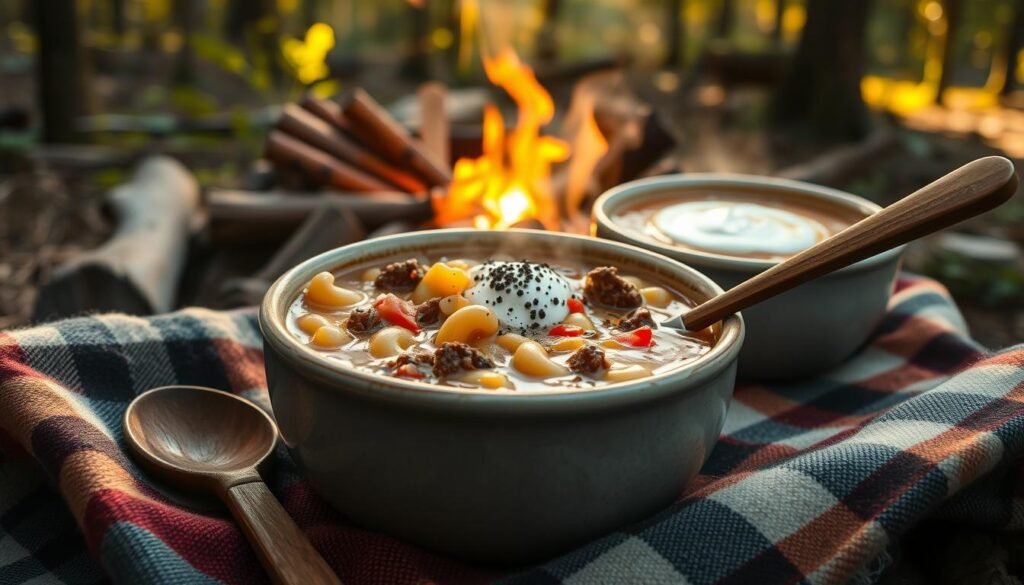
- Great flavor outdoors—warm bowls taste extra comforting under the pines.
“A quick, steady-heat routine builds confidence for newer campers.”
That mix of speed, low gear, and big flavor is why I keep this classic on my camping menu. It brings family comfort without fuss, even in wind or rain when I finish under the tarp.
What You’ll Need for Camp: Simple, Real Ingredients That Travel Well
Packing smart for a campsite dinner starts with ingredients that travel and hold up in a cooler. I prioritize items that stay fresh, need little prep, and make the final meal taste like home.
Core items: 80/20 ground beef (or 90/10, or swap turkey/chicken/plant-based), about 6–8 cups chicken broth, elbow macaroni, a block of sharp cheddar, and milk or heavy cream. I add dairy after simmering to keep the texture silky.
Aromatic base: mirepoix—onion, carrots, celery—plus cloves garlic and dried oregano or thyme. I dice veggies at home and bag them so they’re ready to drop into the pot.
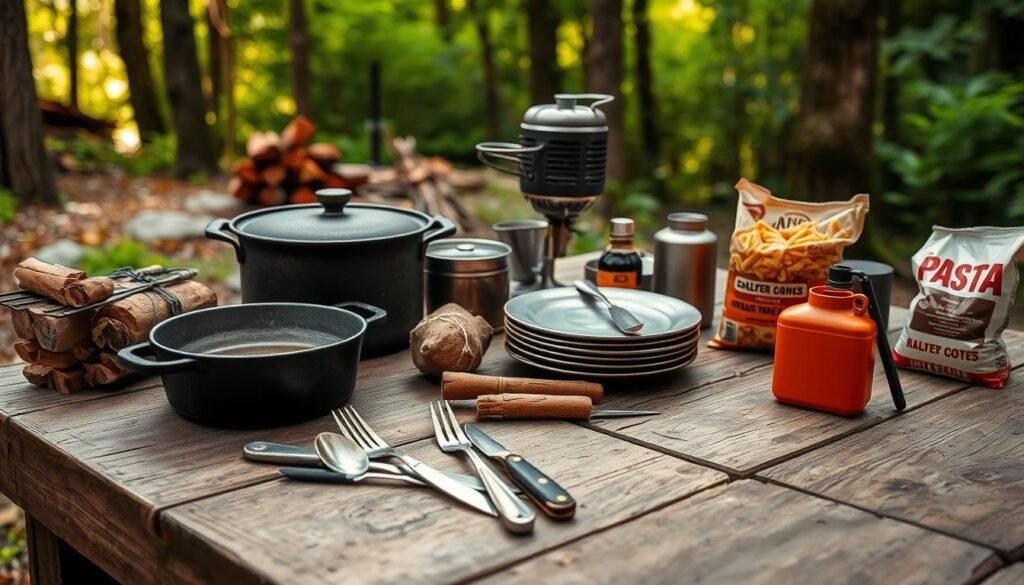
Thickeners & finishers: all-purpose flour, a splash of olive oil or a knob of butter, salt, pepper, and a teaspoon of white vinegar or pickle juice for that classic macaroni cheeseburger note.
| Item | Pack | Travel Tip | Why I Bring It |
|---|---|---|---|
| Ground beef | Airtight container on ice | Keep under ice; use early | Fat adds flavor and richness |
| Sharp cheddar | Block in sealed bag | Grate by hand at camp | Melts smoother than pre-shredded |
| Chicken broth | Resealable carton | Opens easily, stores in cooler | Builds savory base fast |
| Dried herbs & flour | Small zip bags | Lightweight, shelf-stable | Seasoning and body for the broth |
- I carry a tiny bottle of white vinegar or a ramekin of pickle juice for a bright finish.
- Salt and pepper live in my spice kit; olive oil or butter starts the sauté.
Camp Kitchen Gear: One Pot, Medium Heat, Minimal Cleanup
My camp kitchen setup aims to make cooking simple, steady, and spill-free. I pack tools that protect the flame and cut down on dishes so dinner comes together fast.
Thicker cookware for even cooking
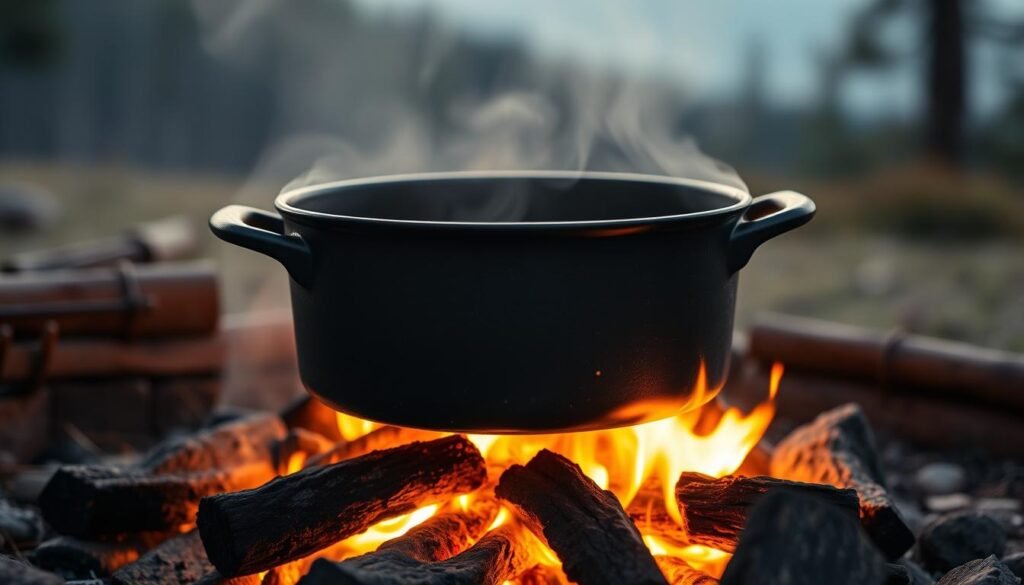
I use a large pot or Dutch oven because the thicker walls spread heat evenly on a camp stove. That reduces scorching while I brown meat and build a roux for the soup.
Controlling the flame and wind
A windscreen and careful burner control lock in medium heat so browning and the final dairy step stay gentle. I avoid cranking the flame; steady warmth keeps cheese from separating and keeps the texture silky.
Simple cleanup and campsite flow
I keep a lid handy to bring the pot to a simmer faster and save fuel, then remove it while the pasta cooks to stop boil-overs. Nesting bowls, a small cutting board, and a wash basin with warm water make cleanup quick after a few minutes serving.
- Long spoon and heat-safe spatula to scrape browned bits.
- Rotate the pot a quarter turn in gusts so one side doesn’t overcook.
- Pre-measure spices and flour into labeled baggies to save minutes and avoid spills.
- Use a trivet and insulated mugs to serve directly without extra dishes.
| Gear | Why | Camp Tip | Use |
|---|---|---|---|
| Large pot / Dutch oven | Even heat spread, less scorching | Heavy base holds steady on a burner | Brown meat, simmer soup |
| Windscreen | Stabilizes flame | Improves fuel efficiency | Maintain medium heat |
| Lid & long spoon | Faster simmer, safe stirring | Remove lid for pasta to prevent boil-over | Build roux, stir cheese in off-heat |
| Nesting bowls & wash basin | Less clutter, easy cleanup | Warm water for quick washing | Serve and tidy fast |
One Pot Macaroni Cheeseburger Soup: Step‑By‑Step on a Camp Stove
Follow this simple sequence at camp to get dinner on the table fast and without fuss. I aim for steady flame control so each stage finishes cleanly.
Begin with browning. Begin with a hot, steady flame and brown the ground beef for five to seven minutes with a pinch of oregano or thyme. I drain or set the beef aside so the next steps pick up all the fond.
Sauté the mirepoix and build a roux. In the same pot I sauté onion, carrot, and celery in butter or oil for about 5–10 minutes until glossy. I add garlic for 1 minute, then stir in flour for 1 minute to remove the raw taste.
Deglaze, simmer, and finish
I splash chicken broth to lift browned bits, scrape the bottom, then add the rest of the broth and elbow macaroni. I bring it up to a steady simmer and cook the pasta 5–8 minutes until al dente.
With the heat lowered, I stir in heavy cream or milk, then slowly add shredded cheddar cheese so the cheese melts smoothly. I finish with a teaspoon of vinegar or pickle juice and adjust salt and pepper.
“Keep dairy off high heat and shred your own cheese for the creamiest finish.”
- Return the browned beef to the pot, warm gently without boiling.
- If the soup thickens, add a few tablespoons of broth to loosen it before serving.
- Serve straight from the pot into bowls or mugs and keep the lid handy to hold heat between servings.
| Step | Time | Camp Tip |
|---|---|---|
| Brown beef | 5–7 minutes | Use medium heat and don’t crowd the pan |
| Sauté mirepoix + garlic | 6–11 minutes | Cook until veggies are glossy, then add flour |
| Simmer with elbow macaroni | 5–8 minutes | Keep a steady simmer; stir to prevent sticking |
Pro Tips for Creamy, Cheesy Results Outdoors
A few careful moves in the last minutes make the difference between grainy and velvety. I treat the finish as a delicate step, not an afterthought.
Shred fresh cheddar at camp. Freshly grated cheese melts cleaner than pre-shredded blends that carry anti-caking starch. I always grate at the stove so the cheese folds into the liquid quickly and evenly.
Use medium heat and cut flame before adding dairy. I trim the burner, or move the pot off the flame if wind or altitude plays tricks. That pause stops proteins from seizing and keeps the texture smooth.
I stir slowly and patiently; a few minutes of gentle mixing turns the mix glossy. If leftovers tighten overnight, I add a splash of broth or cream and warm gently until the mix loosens and the flavors bloom.
Final practical tips:
- Stir off direct heat when melting cheese for extra creaminess.
- Use a silicone spatula to avoid sticking and scorched dairy.
- After thinning, taste and re-season—added liquid mutes salt and aromatics.
“Low and slow at the end is the trick — it keeps the texture silky and the flavors bright.”
| Tip | Why it works | Camp action |
|---|---|---|
| Grate cheese fresh | Melts faster, no starch coating | Grate at camp, add off heat |
| Cut heat before dairy | Prevents grainy texture | Lower burner or remove pot |
| Loosen with broth or cream | Restores glossy, spoonable texture | Add small splashes, re-season |
Ingredient Swaps and Flavor Boosts I Love at Camp
When packing for camp, I plan swaps that save cooler space without losing big backyard flavors. These swaps keep the meal flexible and easy to store while staying true to the cheeseburger character.
Protein swaps
If I’m out of ground beef, I brown ground turkey, chicken, or a plant-based crumble. I season them the same way so the final bowl keeps that familiar beefy note.
Pasta alternatives
I swap macaroni for small shells, ditalini, or small diced potatoes that simmer until tender. Potatoes add heft and help stretch the meal when cooler space is tight.
Cheeseburger flair
Crispy bacon, chopped dill pickles, diced tomatoes, and sliced green onions add immediate cheeseburger flavor. I pack cooked bacon if fuel is short and sprinkle it on at serving.
- I pick sharp cheddar for punch, or mix mild cheddar if the crew prefers gentler cheese.
- A splash of pickle juice brightens the bowl—add it slowly and taste as you go.
- Frozen corn or peas are easy veggies to toss in from the cooler for color and sweetness.
- If I need more volume, extra potatoes or an extra cup of stock stretch the soup without losing texture.
“Small swaps and smart packing keep camp meals flexible, tasty, and easy to store.”
Make‑Ahead, Packing, and Safe Storage in an Airtight Container
Packing meals for camp means juggling safety, space, and how things will hold up in a cooler. I follow simple steps so flavors stay bright and everyone eats safely.
Prep smart: If I make this ahead, I cook the pasta separately to prevent soggy macaroni and store it in an airtight container. The base can sit chilled in the fridge for up to 3–4 days before travel.
- I chill the base completely then pack it on ice so chicken and other proteins stay below 40°F during the drive.
- At camp, I reheat the base first in the same pot, then add pasta in the last few minutes so it returns to al dente without getting mushy.
- Because the soup thickens as it rests, I bring extra broth or a cup of cream to loosen it while reheating.
| Action | Why | Camp Tip |
|---|---|---|
| Label containers | Track prep date | Use small masking tape |
| Separate raw/cooked | Prevent cross‑contamination | Top shelf for cooked items |
| Portion meals | Open only what you need | Reduces time at lukewarm temps |
When in doubt, reheat until steaming and stir often. I keep cooler drains closed and layer ice packs around containers so food stays safe for the whole trip.
Reheating at the Campsite Without Losing That Silky Texture
I treat reheating like a final, careful step that brings the meal back to life. I warm chilled leftovers gently over medium heat and stir every minute or so. This keeps the base from sticking and helps the texture become silky again.
If the mix is thick from cooling, I add a small splash of broth first. For richer bowls I follow with a touch of cream. I avoid a rolling boil because fast heat can split dairy and make the cheese grainy.
I pull the pot off the burner before adding more cheese and stir the shreds in away from direct flame. After thinning, I always taste and re-season—extra liquid can dilute salt and aromatics.
To save fuel, I reheat only what I’ll serve and keep the rest cold in the cooler. I serve promptly once hot so the pot isn’t idling on heat and the pasta stays tender.
“Gentle heat and patient stirring are the secret to restoring a creamy, spoonable bowl.”
- Warm over medium heat, stirring every minute to prevent scorching and regain silkiness.
- If too thick, add broth first; use cream for extra richness.
- Do not boil; bring up slowly to protect dairy and texture.
| Action | Why | Camp Tip |
|---|---|---|
| Warm over medium heat | Prevents scorching and separates | Stir every minute for even warming |
| Add small splash of broth or cream | Loosens thickened base and restores gloss | Add little by little, taste and adjust |
| Add cheese off heat | Stops cheese from seizing or going grainy | Pull pot off burner before stirring in shreds |
Serving Ideas Around the Fire
A simple topping station turns dinner into a social moment. Around the fire I set out small cups of garnishes so everyone can finish their bowl just how they like it.
Top with extra shredded cheddar, bacon bits, and green onions
I bring shredded cheddar cheese in a sealed bag and grate at the stove. Freshly shredded cheese melts cleanly and adds instant richness.
I also set out crisp bacon bits, sliced green onions, chopped dill pickles, and diced tomatoes. These require no cooking and give big flavors fast.
To keep things campsite-friendly I ladle hot soup into insulated mugs. That keeps hands warm and makes it easy to pass bowls around the fire.
“A topping bar makes dinner feel playful and lets family members customize every bite.”
- A light dusting of paprika or black pepper adds color and a subtle lift in flavor.
- Crushed potato chips or croutons bring crunch for a burgers-and-fries nod.
- Pair larger appetites with crusty bread or quick camp garlic toast to soak up leftover broth.
| Topping | Pack | Camp Tip | Why it works |
|---|---|---|---|
| Shredded cheddar cheese | Small sealed bag | Grate fresh at stove | Adds creamy, melty richness |
| Bacon bits & green onions | Zip bag / small container | Pre-cook bacon or pack crisp bits | Crunch and onion brightness |
| Dill pickles & diced tomatoes | Ramekins or cups | Add at serving, no heat required | Pushes flavor toward classic burger notes |
| Croutons / crushed chips | Snack-size bag | Keep dry until serving | Provides contrast and playful texture |
Nutrition‑Forward Comfort: Balancing Veggies, Protein, and Flavor
I aim for meals that deliver real energy after a long day hiking. I start by loading the mirepoix into the pot so veggies and fiber form the base of the bowl.
Protein choices matter: I pick lean beef or chicken for solid protein, or turkey when I want a lower-fat option. For extra lift, I sometimes use higher-protein macaroni so the bowl keeps hunger at bay without adding bulk.
I control richness with milk or cream and keep cheese portions steady so the dish stays comforting without being heavy. I season with garlic and herbs, then add a splash of acid at the end to brighten the flavor.
Portioning by the cup helps with fuel planning; each serving holds predictable calories and protein for hungry hikers. Packing pre-cut veggies in an airtight container keeps them crisp and saves time at the stove.
“Thoughtful ingredients and smart portions make camp meals both nourishing and simple.”
| Choice | Why | Camp Tip |
|---|---|---|
| Lean protein (chicken / beef) | High protein, lower fat | Cook early and reheat gently |
| Pre-cut veggies | Fiber and color | Store in airtight container |
| Milk vs cream | Control richness | Use milk to lighten, cream to indulge |
Ready to Stir the Pot? Let’s Make Dinner Under the Stars
Gather your gear, prepped ingredients, and a steady flame — dinner comes together fast with a few clear steps.
Simple gear, steady heat, and fresh cheese make this a true one pot camp winner. I set a large pot over the burner, add olive oil, then add ground and brown the beef. I scoop the beef out, sauté onions, carrots, and celery with cloves garlic, sprinkle flour, then deglaze with chicken broth.
I drop elbow macaroni into the simmering broth and cook until al dente. I cut the heat, stir in heavy cream and shredded cheddar so the mixture stays glossy. A splash of pickle juice brightens the broth, and a cup of extra broth loosens the mix if it tightens.
Grab bowls, keep the lid on between servings, and enjoy cheeseburger soup under the stars. It takes about 30 minutes and rewards simple ingredients, steady heat, and friendly camp company.
FAQ
What makes this camping meal my favorite for tent trips?
I love that it’s comforting, packs bold cheddar flavor, and uses simple ingredients like ground beef, elbow macaroni, and chicken broth. It cooks over steady medium heat in a large pot or Dutch oven, so cleanup stays minimal and everyone gets a warm, hearty dinner after a day outside.
Can I make this recipe with ground turkey or a plant-based substitute?
Yes — I often swap ground beef for ground turkey, chicken, or a plant-based “beef” to lighten the meal or accommodate preferences. The cooking steps stay the same: brown the protein first, then build flavor with sautéed onions, carrots, celery, and garlic.
How do I keep the cheese silky and not grainy when melting outdoors?
I always remove the pot from direct high heat before adding milk or heavy cream and shredded sharp cheddar. Adding dairy off the flame and melting cheese slowly while stirring keeps the texture smooth. Shredding your own cheese helps it melt evenly.
What are good pantry swaps for elbow macaroni at camp?
Small shells, ditalini, or small tubular pasta work great and cook in a similar time. If you want a gluten-free option, I’ll use small potatoes cut into bite-size pieces; they add body and soak up the broth nicely.
How do I prevent soggy pasta when prepping ahead of time?
If I make the base ahead, I cook the noodles separately and store them dry or al dente in an airtight container. At camp I add them near the end so they don’t overcook. That preserves texture and keeps the broth from getting gluey.
What’s the easiest way to thicken the broth into a creamy finish outdoors?
I make a simple roux by sautéing flour in olive oil or butter after the mirepoix softens. Deglazing with chicken broth and simmering before adding cream creates a silky base that thickens as it cooks. A splash of heavy cream at the end boosts richness.
Can I add extra veggies without ruining the flavor?
Absolutely. I add finely diced carrots and celery to the aromatics for sweetness and texture. Tomatoes, bell peppers, or frozen corn also work — just adjust simmer time so all veggies reach a tender, balanced bite.
Is pickle juice or vinegar really necessary, and how much do you use?
I use a tablespoon or two of white vinegar or pickle juice at the end to brighten flavors and cut the richness. It’s optional but transforms the dish from rich to well-rounded, especially when heavy cream and cheddar are involved.
How should I store leftovers and reheat them at camp without losing texture?
I cool leftovers quickly, pack them in an airtight container, and keep them on ice. For reheating, I warm gently over medium-low heat and add a splash of broth or cream to loosen the mixture, stirring until it reaches a silky consistency.
What campsite gear do I need to make this successfully?
Bring a large pot or Dutch oven, a reliable camp stove with steady medium heat control, a spatula, a sharp knife, and an airtight container for storage. Olive oil, a small shaker of salt and pepper, and a microplane for shredding cheddar are handy too.
How long does it take to make from start to table on a camp stove?
From browning the meat to melting in the cheese, plan for about 30–40 minutes. If you pre-chop veggies or pre-shred cheddar, I can shave off time and get dinner on the table that much faster.
Any quick serving ideas to make it feel special around the fire?
I top bowls with extra shredded cheddar, crispy bacon bits, and chopped green onions. A few dill pickle slices or a sprinkle of crushed crackers adds crunch and that classic cheeseburger flair.
0 Comments