Did you know tents are often 50% heavier than tarp shelters? I’ve hiked with both and the weight difference is huge. Tarp shelters are not only lighter, but they also offer greater flexibility in setup, allowing you to adapt to various environments and weather conditions.
After a surprise storm in the Rockies with a 1.2-pound sil-nylon tarp, I was convinced. These shelters aren’t just for serious backpackers. They’re great for car camping or climbing peaks, cutting weight without losing strength. The ability to quickly set up a tarp in unpredictable weather has saved me countless times, making it an essential part of my gear.
They’ve saved my gear from floods and kept me dry in crazy winds. Let me show you why tarp shelters are changing outdoor adventures. With their lightweight design and ease of use, they have become my go-to choice for any trip, providing a reliable shelter that enhances my outdoor experience.
Tarp shelters are more versatile than traditional tents. I’ve tested them in deserts, forests, and coastal trails. They let in fresh air while keeping rain out, and they’re small enough to fit in tight backpack spaces.
Why Tarp Shelters Are a Game-Changer for Outdoor Enthusiasts
Switching to tarp shelter camping has changed my outdoor-game. Unlike bulky tents, these setups are lightweight and flexible. They are perfect for casual trips and emergencies. Here’s why I love them.
The Lightweight Advantage for Backpackers
My pack lost 3–5 pounds with a tarp. That’s a big difference when hiking long distances. Lighter gear means less tiredness and more energy for longer hikes. This reduction in weight not only eases the strain on my back but also allows me to carry additional essentials like food and water, which are crucial for extended trips. The freedom of movement and agility I gain from a lighter load is remarkable, making steep climbs and challenging terrains much more manageable.
I’ve tested this on weeklong treks. Every ounce saved was crucial. On one memorable hike through the Rockies, I realized that the weight I saved with my tarp allowed me to enjoy beig in the moment, as I wasn’t constantly fatigued. It was a game-changer, enabling me to tackle longer routes and explore areas I might have otherwise skipped due to exhaustion.
Weather Versatility Made Simple
Tarp shelter camping tips help you adapt to weather. In storms, I angle tarps to shed rain. For sun, I leave sides open for air.
Size is important too. A 7×9-foot tarp is great for solo trips. Groups need 10×12+ for comfort. Colors like olive or gray blend into forests. But bright orange options are visible in emergencies.
A quality tarp costs $50–$100, much cheaper than tents. Over five years, I’ve saved hundreds. With proper care, tarps last a long time, making them a smart choice for campers.
Essential Types of Tarp Shelters for Every Camping Situation
Choosing the right tarp shelter designs depends on where and how you camp. Over years of backpacking, I’ve tested setups for forests, deserts, and storms. Here are the most reliable tarp shelter ideas I use, from simple to advanced.
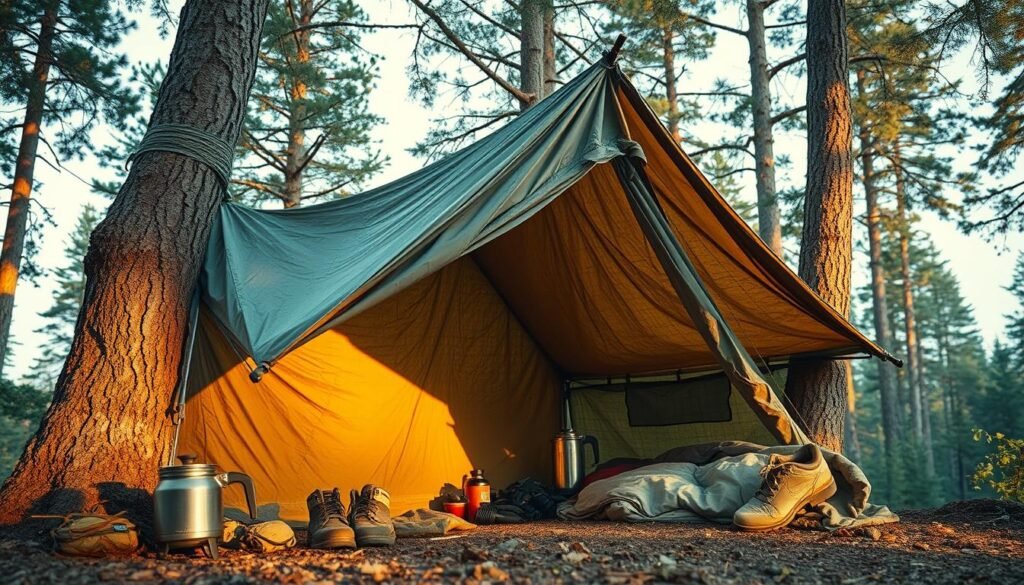
Beginners start with the classic A-frame—a single tarp draped between two trees. It’s quick to set up and perfect for forest camping with tree coverage. The lean-to design works magic in sudden rain, offering instant wind protection by angling the tarp against a single anchor point. Both are easy diy tarp shelter options that keep you dry without complexity.
Intermediate setups like the diamond configuration use four points for stability in wind. During a storm in the Adirondacks, I adjusted a diamond setup by tying to trekking poles and rocks, which blocked driving rain. Pyramid designs add vertical height, creating more headroom and space—ideal for multi-night stays. For advanced users, the flying diamond and bat wing designs maximize coverage with minimal poles. These let you create large shelters even in open areas without trees.
Nature itself is a tool. I’ve combined tarps with fallen logs or rock ledges to build hybrid shelters. For example, draping a tarp over a boulder’s edge creates a no-fuss windbreak. Each design’s success hinges on matching the terrain and weather. Start simple, then experiment as you gain experience.
Finding the Perfect Tarp Materials for Durability and Protection
Choosing the right material for your tarp shelters is all about finding a balance. I’ve hiked many miles and tried out different materials. The right choice can make your shelter last longer and be more comfortable, no matter where you are. For instance, if you often find yourself in wet conditions, opting for a silicone-coated fabric can provide the waterproofing you need. On the other hand, if weight is a critical factor for long treks, lightweight options like silnylon might be more suitable. Additionally, consider the ease of setup and the amount of space you require; some materials offer better structural integrity against wind and rain. Ultimately, your experience and the specific challenges of your environment will guide you to the ideal material that meets your needs.
Silnylon vs. Polyester vs. Canvas: Choosing Your Ideal Material
Silnylon is my go-to for lightweight tarp shelters. It’s super light, but it stretches when wet, which can lead to sagging. So, I always carry cord locks with me to maintain tension. Polyester keeps its shape in the rain but is heavier, making it a reliable choice for those who prioritize stability in wet conditions. Canvas is very durable but very heavy, best for base camps where weight isn’t an issue and long-term durability is essential, especially in rugged environments where wear and tear are a concern.
Waterproofing Considerations for Your Environment
Silicone-coated silnylon is great for rainy areas. For coastal humidity, I use Gear Aid’s Silicone Waterguard, which I reapply every six months. In dry areas, uncoated canvas works well, but I seal seams with Aquaseal to prevent leaks.
Weight and Packability Trade-offs
Dyneema Composite Fabrics are very light but expensive. I prefer earth-toned silnylon for forests and bright orange for emergencies. Do you want to save weight or protect against rough terrain?
Mastering Tarp Shelter Setup: Techniques and Must-Have Accessories
Essential Knots Every Camper Should Know
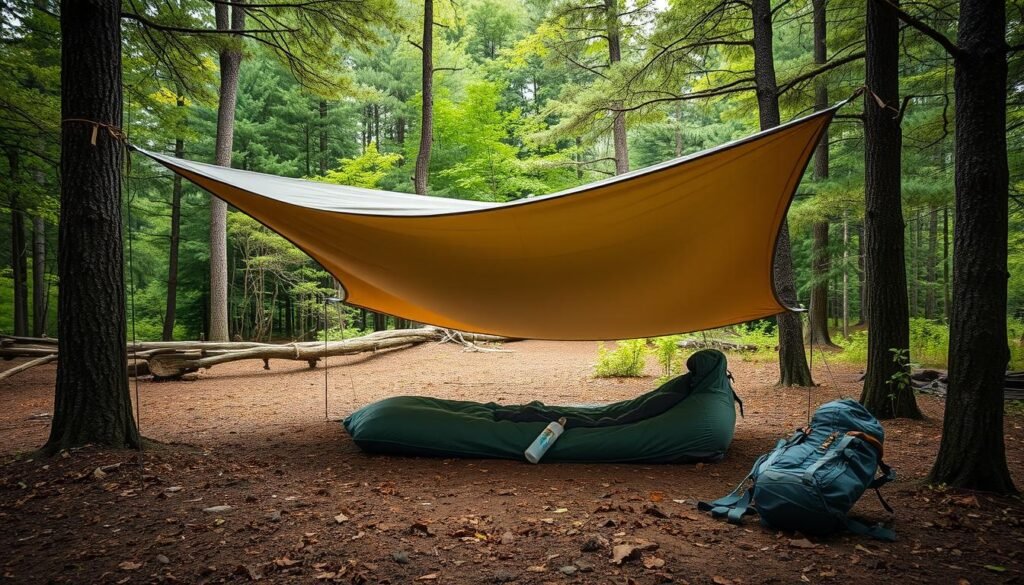
Three knots are key for my tarp shelter techniques. The taut-line hitch adjusts tension easily. The bowline makes secure loops for anchors. The trucker’s hitch tightens lines fast. Learn these, and setting up becomes easy.
Anchoring Systems for Different Terrains
In soft soil, I use MSR Groundhog stakes for stability. For rocky areas, I loop cord around boulders or use shepherd’s hooks. In snow, I bury trekking poles and anchor lines to them. Windy days need more guylines and lower profiles to avoid lift.
Accessory Checklist: From Guylines to Ground Stakes
My essential kit has 550 paracord for its strength and visibility. It also includes various stakes: lightweight aluminum for dirt and titanium for light trips. A seam sealer and repair kit are must-haves. Adding a tarp shelter setup guide–style pole system, like the Gossamer Gear Ridgepole, is great for open spaces without trees.
Creative Tarp Shelter Designs I’ve Tested in the Wild
After years of trying out tarp shelter designs, I’ve found three that really work. The first, called the “Wilderness Fortress,” uses two tarps for top-notch weather protection. To how to build tarp shelters like this, place a big tarp on top and a smaller one on the ground. This setup kept me dry for a week in Oregon’s misty forests.
For windy days, my “Mountain Wedge” design is a lifesaver. It’s shaped to cut through strong winds. By angling the tarp against rocks, it stood up to high winds on peaks. The secret? Use paracord and tree straps to anchor the windward side lower than the leeward edge. This how to build a tarp shelter method focuses on aerodynamics over brute force.
Need a place for a big group? My “Modular Group Camp” connects two tarps with ridgelines. It creates separate areas for sleeping and cooking. During a family trip in the Rockies, this setup kept everyone dry under one system. Use lightweight guylines to link tarps, leaving room for a fire pit. Each design fits different terrains, from rocky slopes to open meadows.
These tested designs show that with the right tarp shelter designs, you can tailor protection for any adventure. Adjust materials for your environment and always plan anchor points before setting up.
Elevating Your Camping Experience with Tarp Shelters
Switching to tarp shelters has made my outdoor trips lighter and more fun. These systems are more than just gear; they change how you think. They save weight, letting me hike further, and adapt to any weather.
For tent users, starting with a tarp as a vestibule is a great first step. It’s a way to ease into tarp shelter camping without feeling overwhelmed. This approach helps beginners build confidence.
Learning to use tarp shelters changes how you connect with nature. Whether you’re in the mountains or car camping, the skills you learn are useful everywhere. Every challenge you face, like mastering knots or weathering storms, strengthens your bond with the outdoors.
My advice is to start small and get comfortable with tarp shelters in places you know. As you gain experience, you’ll feel ready to explore more remote areas. Tarp shelters are for anyone who wants to simplify their camping experience. Next time you go on an adventure, think about how a tarp could enhance your journey.
Hope that helps
Catch you on my next post!
0 Comments