I remember collapsing at camp after a long ridge hike, hungry and cranky, facing a tangle of pans and soggy plans. I wanted dinner fast, warm, and with as little cleanup as possible. That frustration turned into a simple method I now trust on every trip.
My campsite approach uses a sturdy Dutch oven or deep skillet, 12 oz linguine, 4.5 cups of broth, tomatoes, garlic, and a shower of fresh Parmesan and basil. It cooks start-to-finish in about 20 minutes on a camp stove when I stir constantly and season before adding liquid for better absorption.
This guide shows fuel-saving steps for wind and altitude, what I pack chilled versus dry, and how I reheat leftovers safely with a splash of water or broth. I’ll also flag gear and affiliate links I actually use so you can pick what fits your kit.
Key Takeaways
- Quick campsite dinner that cooks in ~20 minutes with minimal cleanup.
- Pack a Dutch oven, simple ingredients, and a small supply of broth for reliability.
- Stir constantly to prevent sticking; finish off-heat with cheese and basil.
- Leftovers keep 4–5 days chilled; reheat with a splash of water or broth.
- I list gear and transparent affiliate links so you know what I use.
Why I Cook One Pot Pasta at the Campsite
On the trail I favor techniques that turn pantry staples into full meals in minutes with minimal water and gear. My goal is a hot bowl that tastes slow-simmered but takes less time and fuel than fallout from a full cook setup.
Fast, flavorful dinners with minimal cleanup
I use the cook-in-sauce approach because it saves fuel and reduces messy washing at the spigot. Cooking noodles directly with tomatoes and aromatics takes about 8-10 minutes after a boil. I season the pan before I add liquid so the spices bloom and the strands absorb flavor as they hydrate.
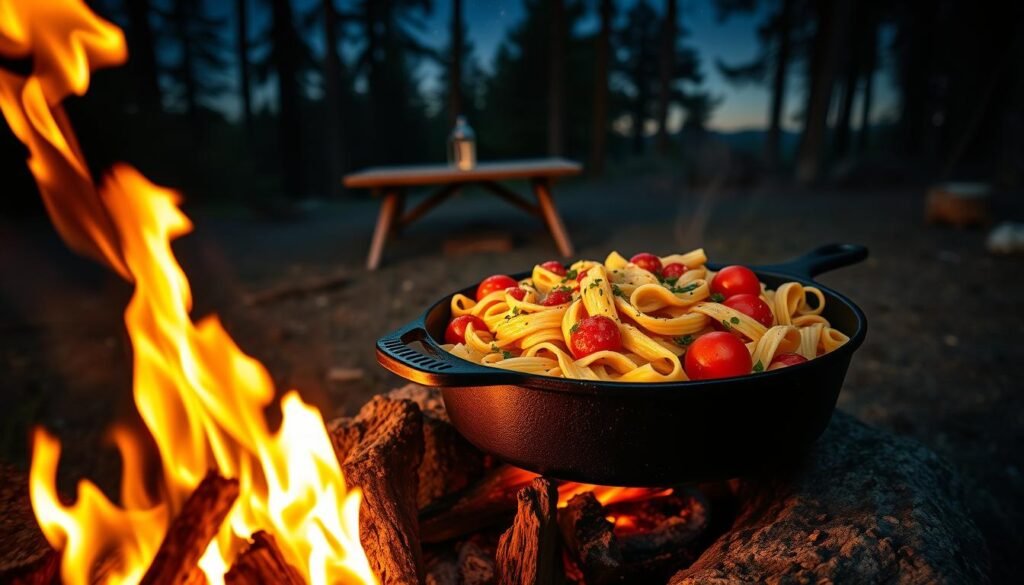
How the “cook pasta in the sauce” method saves fuel and time
Practical ratios help: roughly 1 cup of liquid per 2 ounces of pasta keeps the sauce glossy and the water use low. I stir often to prevent sticking and to coax a silky, starchy finish. Splitting ingredients—using half the tomatoes early and the rest near the end—gives both body and bright pops of freshness.
“The trick is frequent stirring—it’s my insurance against clumps and scorch when the wind hits the stove.”
- Less water to carry, no draining.
- Meals ready in minutes with a single heat source.
- Flexible with fuels and gusty conditions.
Camp-Friendly Gear and Setup
A reliable Dutch oven or deep skillet and a steady stove change how smoothly dinner goes on the trail.
Best pot for the job: Dutch oven or deep skillet
I carry a midweight 6-quart Dutch oven when I expect to feed a group. It holds 12 oz of linguine plus 4–5 cups of liquid comfortably and gives room to stir without splashes.
Stainless steel deep pans and quality nonstick pans cut down on sticking. I still stir often because gusts and uneven heat can scorch food outdoors.
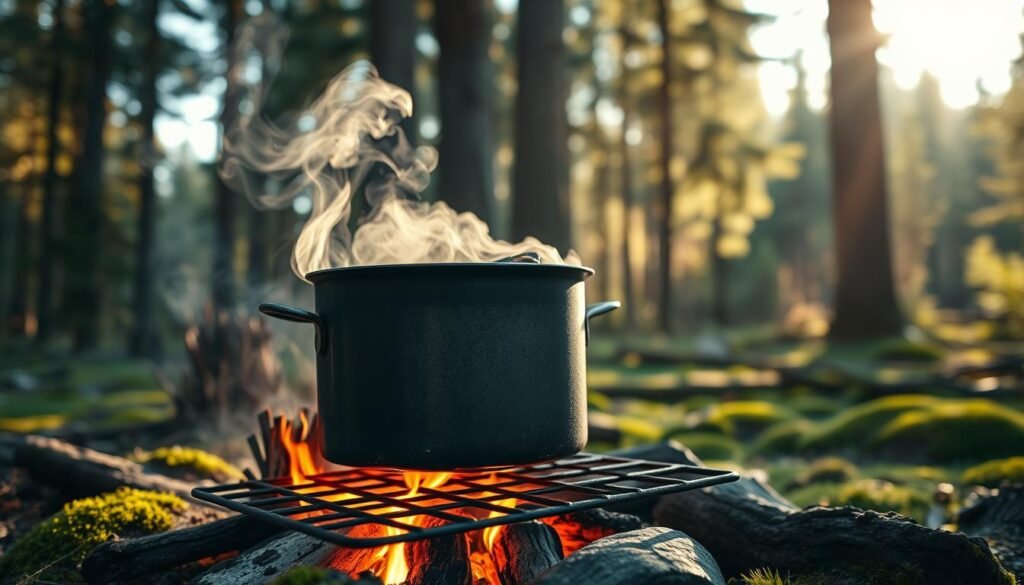
Stove, fuel, and wind management at camp
I set my stove on a level surface and use a windscreen to keep steady heat. That saves fuel and avoids chasing hot spots.
Plan extra fuel for gusty conditions or high elevation; simmering needs grow when the air is thin.
Key tools I bring
- Long wooden spoon and tongs for constant stirring and folding noodles under the liquid.
- A sharp camp knife and small cutting board for quick prep and a bit of oil to bloom aromatics in the pan.
- Prepped aromatics in an airtight container in the cooler so leftovers and produce stay fresh in the fridge.
- A collapsible basin for quick dish cleanup and to keep camp tidy after the meal.
“Constant stirring is the heart of this method; the right tools make it easy even when wind and heat vary.”
| Cookware | Capacity | Advantages | Trail Notes |
|---|---|---|---|
| 6-Quart Dutch Oven | Large | Room to stir, retains heat | Packs well; best for group meals |
| Stainless Deep Skillet | Medium | Durable, less sticking | Good for high-heat sear and sauce |
| Nonstick Deep Pan | Medium | Low sticking; lighter weight | Still requires vigilant stirring |
| Camping Combo Set | Varies | Compact, versatile | Check sizes to fit your burner |
I link gear and my favorites through affiliate links so you can pick what fits your kit. Packing the right cookware and tools makes outdoor cooking faster and cleanup lighter, leaving more time for the fire and the view.
My Base Tomato, Garlic, and Parmesan One Pot Pasta
My go-to base starts with hot oil, softened onion, and quick-breaking tomatoes so dinner comes together fast on a windblown stove.
Ingredients I pack for the trailhead cooler: 12 ounces linguine, 12 ounces halved cherry tomatoes, 1 large chopped onion, 2 tablespoons olive oil, 2 cloves garlic, 4½ cups low-sodium chicken broth, 1 cup freshly grated parmesan, chopped basil, salt, and pepper.
I heat 2 tablespoons of olive oil and sauté the onion about 3 minutes until soft. Then I add garlic for 30 seconds so it perfumes the oil without burning on a camp flame.
Halved tomatoes go in next with a pinch of salt, pepper, 1 tablespoon Italian seasonings, and a dash of red pepper flakes. They break down fast and give body to the sauce.
I slide in the dry pasta and pour 4½ cups of broth around the strands, stirring so everything hydrates evenly. Bring to a boil, then simmer about 10 minutes while stirring until the liquid looks glossy.
Off heat I shower the pot with 1 cup freshly grated parmesan and torn basil, then finish with a drizzle of olive oil. Fresh parmesan melts cleanly and lifts simple ingredients into something rich and ready to eat.
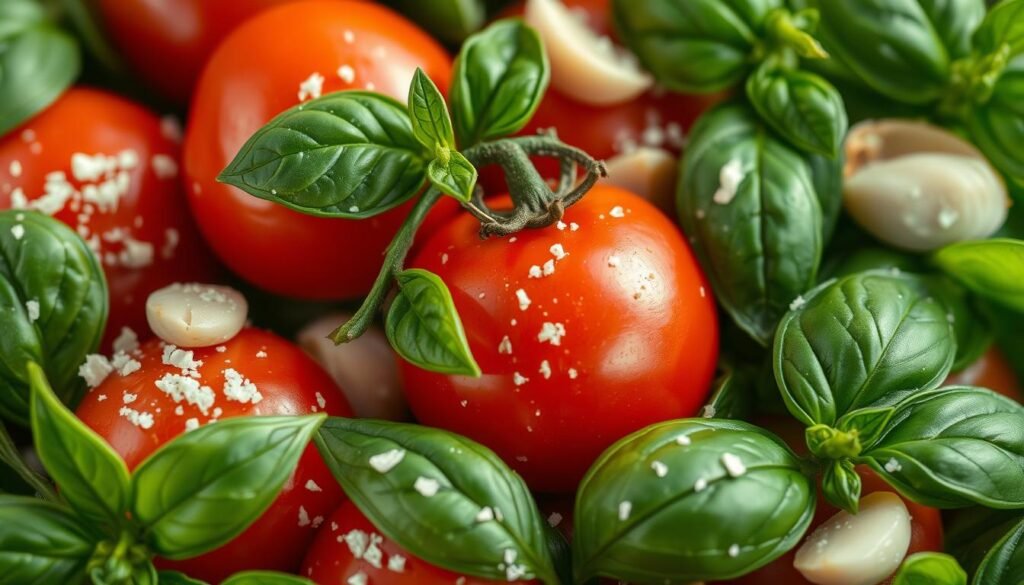
- I keep pre-measured seasonings in a tiny bottle and garlic in a mesh bag to speed prep.
- This base is flexible—swap proteins or veg while keeping the same method and ratios.
“Fresh cheese and a good stir are the easiest ways to make campsite cooking taste like effort.”
One Pot Pasta Recipes for Every Camper
I plan a small set of go-to menus that keep dinner quick, warm, and easy to wash up after. These variations let me swap ingredients without changing the method or adding gear.
Light and fresh: tomato-basil linguine on a camp stove
Place linguine, cherry tomatoes, onion, garlic, basil, olive oil, crushed red pepper, and salt in a deep pan. Add 4 cups boiling water and cook 8–10 minutes, stirring until the starchy liquid forms a bright sauce. Finish with Parmesan and torn basil for a fresh night by the fire.
Hearty meat sauce with ground beef or turkey
Brown ground beef or turkey, add marinara and the jar’s water, then stir in pasta. Simmer about 30 minutes until al dente, stirring to avoid sticking. Garnish with cheese and basil for a filling, warm meal on cool nights.
Spicy spin and dietary swaps
A pinch of red pepper and Italian herbs warms a simple sauce fast. For gluten-free noodles add an extra ½ cup water per 8 oz and taste early. For dairy-free, skip the Parmesan or use nutritional yeast—sauce still turns glossy from the starch.
| Variation | Key Add-ins | Cook Time | Trail Tip |
|---|---|---|---|
| Tomato-Basil | Cherry tomatoes, basil, Parmesan | 8–10 min | Stir often; finish off-heat |
| Meat Sauce | Ground beef/turkey, marinara | 25–30 min | Brown meat first for depth |
| Spicy / GF / DF | Crushed red pepper, extra water, nutritional yeast | Varies | Adjust liquid for GF shapes |
“I keep protein flexible—pouch chicken or pre-cooked sausage makes meal planning easier at camp.”
Step-by-Step: Cooking Over a Camp Stove
Follow my simple track from sauté to finish and you’ll have a hot bowl in minutes. These instructions are tailored for tent camping and wind-prone sites so the process stays reliable outdoors.
Sauté aromatics carefully
I preheat the pot over a steady flame, add a slick of oil, and sauté the onion about 3 minutes until soft. Then I add garlic for only 30 seconds so it becomes nutty, not burnt.
Add tomatoes, seasonings, and the dry noodles
Tomatoes and dry spices go in next to release juices and toast the aromatics. I lay in the pasta and immediately pour water or broth so strands can be nudged under the surface to avoid sticking.
Boil, then simmer — stir frequently
Bring the pan to a boil, then drop to a strong simmer. I stir every minute; outdoors that motion prevents scorch and makes the sauce glossy.
I taste at the 8-minute mark, then every minute until al dente. If the pot tightens up, I add small splashes of liquid and keep stirring so starch emulsifies into a smooth sauce.
Finish off-heat for a silky finish
Remove from heat and fold in Parmesan and torn basil. The carryover heat melts the cheese into a creamy coating without breaking the sauce. I adjust salt and pepper, then serve straight from the pot while piping hot.
“Stirring every minute is my best insurance against clumps and scorch when wind hits the stove.”
Quick safety and night tips: keep the pot centered on the burner and stage ingredients within arm’s reach when cooking after dark to follow the instructions without fumbling.
| Step | Action | Timing | Camp Tip |
|---|---|---|---|
| Prep & Heat | Preheat pot; add oil | 1–2 minutes | Stable surface; windscreen |
| Sauté | Onion then garlic | Onion 3 min, Garlic 30 sec | Keep garlic brief to avoid burn |
| Cook & Finish | Add pasta, liquid, simmer, finish off-heat | Boil then ~8–10 minutes | Stir often; add liquid if tight |
Liquid, Time, and Heat: Getting the Ratios Right Outdoors
I’ve learned that a clear liquid rule keeps dinners predictable when the wind or elevation changes the boil.
Water versus chicken broth: flavor and sodium trade-offs
I usually choose low-sodium chicken broth for deeper flavor without oversalting. It gives body so the sauce finishes glossy rather than thin.
If I use plain water, I taste and add seasonings later so reduction doesn’t concentrate sodium too early.
How much liquid per ounce and when to top up
My go-to ratio is roughly 1 cup of liquid per 2 ounces of dry pasta. That math helps me pack the right amount of cups before a trip.
If mushrooms are in the pot I add a touch more since they drink liquid. Tomatoes or zucchini often release moisture, so I cut back a splash.
When the sauce tightens before the noodles are done, I add measured splashes of broth or water to keep it silky, not soupy.
Altitude, wind, and how they change minutes of simmer
At higher elevation water boils lower, so expect extra simmer minutes and patience. A lid and windscreen keep heat steady and save fuel.
Stir often; that motion prevents clumps and lets starch emulsify into a clingy sauce. It’s the difference between a tired meal and a camp feast.
“Measure first, tweak as you go — that habit keeps camp cooking reliable and relaxed.”
Protein Boosts and Veggie Add-Ins
When I want extra heft after a long hike, I add browned meat and quick-cook veg to turn a simple skillet meal into something that fuels recovery.
Ground meat for extra protein
I brown ground beef, turkey, or Italian sausage first and break up the pieces so they cook evenly. If the meat renders too much fat, I spoon off a little so the finished sauce stays glossy, not greasy.
Tip: After browning I add marinara and a splash of water, then slide the pasta in so everything finishes together.
Quick vegetables for texture and balance
I fold in chopped onion early for sweetness. Spinach and zucchini go in late—they soften fast and keep meal timing tight.
Mushrooms add savory depth but they soak up liquid. I plan a small top-up of broth if the mix tightens before the noodles are al dente.
Creamy finish without fuss
If I want richness, I stir in a splash of milk near the end off heat so it warms through without splitting. A pinch of red pepper and a shower of parmesan lift flavor without long simmering.
- I use just enough oil at the start to bloom aromatics.
- I hold a few tomatoes back to add bright pops at the finish.
- I taste and adjust salt and herbs as the sauce reduces so the pot stays balanced.
| Add-in | When to add | Trail note |
|---|---|---|
| Ground beef/turkey/sausage | Brown first | Drain excess fat for a glossy finish |
| Spinach / zucchini | Last 2–3 minutes | Softens quickly; minimal extra liquid |
| Mushrooms | Early to mid-cook | Soak up liquid; plan to top up broth |
| Milk / cream | Off heat, final stir | Gives creamy texture without breaking |
“A little protein and smart veg choices make trail meals feel like a full, warm dinner.”
Stirring, Seasoning, and Preventing Starchiness
I learned quickly on the trail that active attention makes a big difference in the pot. A steady stir keeps strands separate, helps starch emulsify, and turns leftover broth into a clingy, flavorful finish.
Why constant motion keeps dinner clean and glossy
I stir from the moment liquid hits the pan, sweeping the bottom and folding noodles so starch disperses into the sauce instead of clumping.
During the 8–10 minute simmer I keep a rhythm—every minute or so—to avoid scorch and to even out doneness when wind changes the flame.
Season early, finish smart
I season the dry ingredients with a pinch of salt, a dash of pepper, and my chosen seasonings before adding boiling liquid. That lets flavor sink into the strands as they hydrate.
Garlic goes in early but only long enough to perfume the oil. I taste while cooking and add a splash of liquid if the mix tightens too soon.
- Keep heat steady: avoid cranking the flame into a furious boil.
- Watch for the sweet spot—about 80–90% absorbed—then fold in cheese so the sauce turns silky.
- Finish with cracked pepper to wake the completed pan and a quick taste to correct salt.
“A steady stir and early seasoning are my best insurance against clumps and bland bites on the trail.”
Camp Storage, Leftovers, and Safety
At camp I keep food safety simple: cool leftovers fast, seal them tight, and reheat with care so meals stay tasty and safe.
Fridge-style cooler care: I let the dish drop to near-cool room temp, then move it into an airtight container and set it in the coldest part of my cooler. Treat the cooler like a makeshift fridge and keep temps below 40°F.
- I plan servings so leftovers are minimal and use the cooler for up to 4–5 days when iced regularly.
- In hot weather I eat earlier—heat shortens safe holding time, so I refresh ice often.
To reheat, I return a portion to the pot with a small splash of water or broth and warm gently on the stove. Stir constantly so the pasta loosens and nothing scorches.
I taste and adjust seasoning after warming since reduction can concentrate sodium. If meat was used, I drain excess fat before reheating and heat until steaming through.
“Clear instructions and safe handling keep camp cooking stress-free even when the wind or heat is working against you.”
| Action | Why it matters | Tip |
|---|---|---|
| Cool quickly & seal | Limits bacterial growth | Use an airtight container and ice |
| Reheat gently | Prevents drying and scorch | Add water or broth; stir on stove |
| Eat within 4–5 days | Best quality and safety | Adjust for hot days; plan portions |
Final touch: a light dusting of parmesan after reheating gives the pot pasta a fresh lift and makes the meal feel just-cooked again.
Let’s Eat: Serving Ideas Around the Fire
Dinner at camp works best when I move quickly from stove to bowl, letting residual heat finish the sauce with fresh basil and grated cheese.
I ladle straight from the pot into bowls and shower each serving with torn basil and a generous dusting of parmesan so the warm sauce melts the cheese into a silky finish.
I drizzle a little olive and add a pinch of salt and pepper right before serving to sharpen flavors. If the mix tightens, I loosen it with a small cup of water or a splash of broth and serve immediately.
For extra heft I fold in pouch chicken or sliced sausage in the last minutes so protein warms without drying. A quick tomato-and-onion salad or greens on the side makes the whole dish feel complete around the fire.
These simple one pot pasta touches keep dinner hot, flexible, and bright — ready to eat under the stars in minutes.
FAQ
What makes your one-pot pasta method great for camping?
I love this method because it cuts gear, fuel, and cleanup. I cook the noodles right in the sauce so I use less water and a single pot, which saves time and space at the campsite. The result is rich flavor with minimal fuss—perfect after a long hike.
Which pot should I bring to camp?
I usually pack a 5–7 quart Dutch oven or a deep skillet with high sides. Both hold enough liquid for sauce and noodles, heat evenly, and fit on most camp stoves. Choose lightweight stainless steel or enameled cast iron if you want durability without too much weight.
How much liquid do I need per ounce of pasta?
I start with about 1 to 1.25 cups of broth or water per ounce of dry noodles, depending on shape. If the mix looks dry while simmering, I add 1/4 cup at a time. Using low-sodium chicken broth boosts flavor but lets me control saltiness.
Can I use water instead of broth outdoors?
Yes. Water works fine, but I recommend adding bouillon or seasonings for depth. Broth adds richness and keeps sodium in check. If weight matters, bring bouillon cubes or powdered broth to reconstitute.
How do I prevent the sauce from sticking or getting gummy?
I stir frequently—every minute or two—especially during the first few minutes after boiling. Use steady medium heat, and don’t overcrowd the pot. Finishing off-heat with a little olive oil or grated parmesan creates a silky texture.
How long does it take to cook this way on a camp stove?
From sautéing aromatics to a finished dish, plan 15–25 minutes. Thin shapes like spaghetti or linguine often finish faster, while thicker twists take longer. Altitude and wind can add several minutes, so watch texture rather than the clock.
What proteins travel well for these meals?
I bring pre-cooked chicken, ground turkey, or shelf-stable Italian sausage. Canned tuna or shelf-stable grilled chicken also work. For fresh meat, brown it first at home or keep it cold in a reliable cooler and add near the end of cooking.
Which veggies hold up best on the trail?
I favor cherry tomatoes, bell peppers, zucchini, mushrooms, onions, and spinach. Cherry tomatoes and mushrooms add moisture and flavor; spinach wilts quickly and sneaks in greens without extra prep.
Can I make gluten-free or dairy-free versions?
Absolutely. Swap gluten-free dry noodles and omit parmesan; finish with a drizzle of olive oil or dairy-free cheese for creaminess. Use vegetable or chicken broth for flavor and check labels for added sodium.
How do I finish a creamy sauce without heavy cream?
I stir in a splash of milk or half-and-half off the heat, or whisk a spoonful of cream cheese until smooth. For dairy-free, coconut milk or a nut-based cream substitute adds body without weighing the dish down.
What are my best seasoning tips for bold flavor outdoors?
I season the aromatics before adding liquid so flavors infuse the noodles. Use garlic, onion, crushed red pepper, Italian seasoning, and a pinch of salt. Fresh basil or parsley added at the end brightens the whole dish.
How should I store leftovers after camping?
Cool the meal within two hours and transfer it to an airtight container. Keep it in a cooler or refrigerator; I eat leftovers within 4–5 days. Reheat gently on the stove with a splash of broth or water to loosen the sauce.
Any tips for cooking at high altitude or in wind?
At altitude, water boils at lower temperatures so simmer times increase. I add a little extra liquid and watch doneness. Protect your stove from wind with a windscreen or by cooking in a sheltered spot to maintain steady heat.
Can I prep anything at home to speed up camp cooking?
Yes. I chop veggies, grate parmesan, and portion spices into small bags before I pack. Pre-cooking and cooling proteins like ground beef or chicken saves stove time and reduces fuel use on the trail.
How do I keep sodium under control when using broth and cheese?
I choose low-sodium chicken broth and add salty ingredients like parmesan sparingly, tasting as I go. Using fresh herbs and tomato adds flavor so I don’t need to over-salt.
What tools are essential for camp cooking this way?
I always bring tongs, a wooden spoon, a sharp knife, a small cutting board, and airtight containers for leftovers. A lightweight colander helps if you need to rinse or drain, and a microfleece or hot pad protects hands from hot cookware.
0 Comments